Drawing / Beginner
Draw Two Overlapping Keys: Make Every Edge Belong
Use axes and interrupted outlines to show which key sits on top.
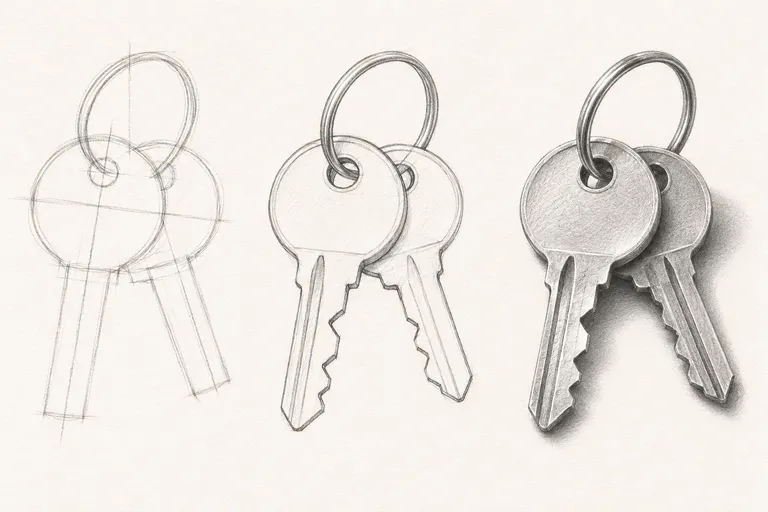
Set up a clear overlap
Place two simple keys on a plain sheet. Let one cross the other without hiding both sets of teeth. Draw a light axis for each shaft and use a loose ellipse for the ring. Compare the angle between the shafts with the real arrangement.
Stop the hidden edges
Draw the top key first. When an edge of the lower key reaches the top key, stop it and pick it up only where it reappears. Lightly block the teeth as a stepped silhouette. Check that every line ends at the correct overlap before adding details.
Keep the shadows selective
Darken the small contact shadows under the ring and where the keys touch. Leave some metal surfaces light. Look at the sketch on its own and follow each visible edge from the head toward the teeth. The lower edge should disappear at the overlap and resume where the key emerges. Fix confusing line endings before darkening anything else.