
Beginner / Focused workshop
How to Measure Proportions in Drawing: A Simple Sighting Method
Improve drawing proportions by comparing height, width, angles, alignments, and negative spaces before committing to detail.
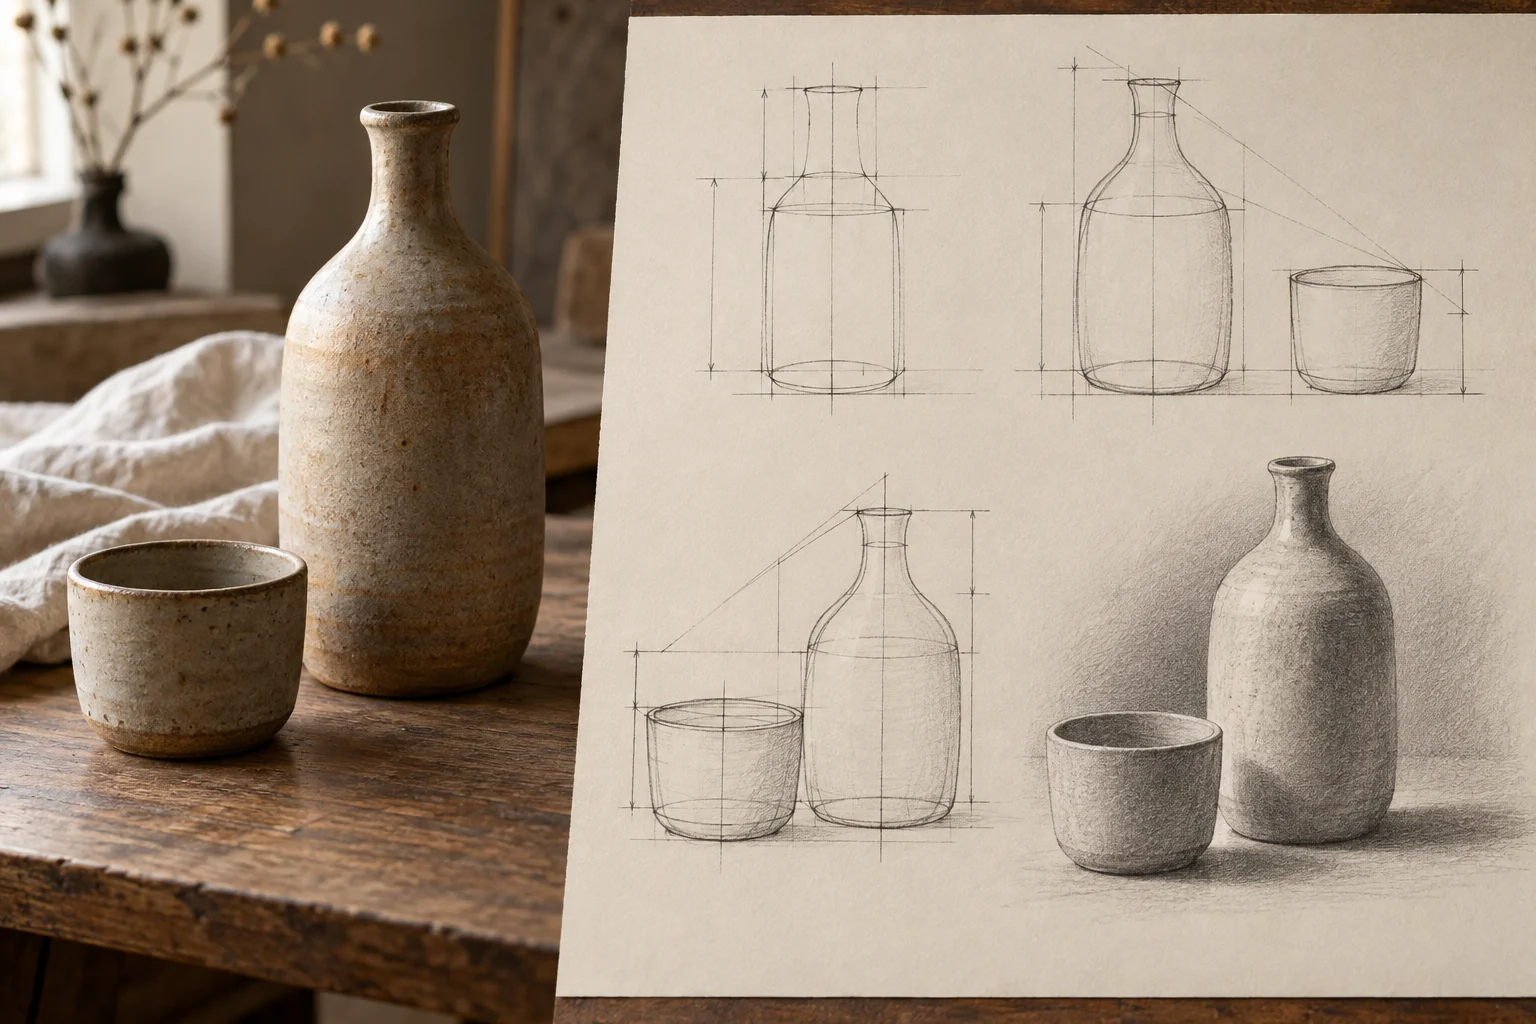
Set up one focused study.
Keep the first attempt small enough to repeat once. Compare decisions instead of judging talent.
- Level
- Beginner
- Practice time
- 35–45 minutes
- Skill focus
- Sighting, proportion, alignment
- Success looks like
- Complete two object studies in which the second version corrects one measured proportion from the first.
Materials
- Drawing paper
- HB pencil
- Eraser
- Two simple household objects
- A stable seated position
Complete two object studies in which the second version corrects one measured proportion from the first.
Keep your viewing position stable
Place two simple objects and sit where you can keep the same eye level. Small movements change overlaps and angles, so return to one position before every comparison.
Hold the pencil at arm’s length only as a comparison tool. Do not treat it as a ruler that produces universal numbers.
Choose one unit
Use the width of one object or another clear interval as a unit. Compare how many times that unit fits into the total height or the distance between objects.
Transfer the relationship to the page at any scale. The ratio matters more than matching the real centimetres.
Check vertical and horizontal alignments
Ask which landmarks sit above, below, left, or right of one another. Drop an imagined vertical through the edges and centres.
These checks often reveal errors faster than staring at the outline.
Compare angles and negative spaces
Hold the pencil along a visible angle, then compare it with the page. Look at the empty shapes between and around the objects as measurable forms.
If the gap is wrong, at least one surrounding contour or placement is wrong. Correct the largest mismatch first.
Make a second attempt with one correction
Circle one proportion error in the first study and write the comparison in plain language. Redraw the arrangement while concentrating on that relationship.
A second attempt provides evidence of learning that endless erasing on one drawing cannot show as clearly.
Diagnose the decision—not your talent.
Common mistakes
Moving the head during every measurement
Mark or remember one stable viewing position.
Measuring tiny details before the envelope
Compare total height, width, and placement first.
Copying the first drawing into the second
Return to the objects and repeat the observation.
Self-check
- I used one consistent unit.
- I checked at least two alignments.
- I compared one negative space.
- The second drawing addresses a named mismatch.
Technical references
LUREXEN independently synthesised this lesson from observation practice and the following education pages. Links are provided for verification; they are not sponsorships.