
Beginner / Focused workshop
Watercolor Paper Guide: Hot Press, Cold Press & Rough
Compare hot press, cold press, and rough watercolor paper through the same wash, edge, lifting, and dry-brush tests before choosing a surface.
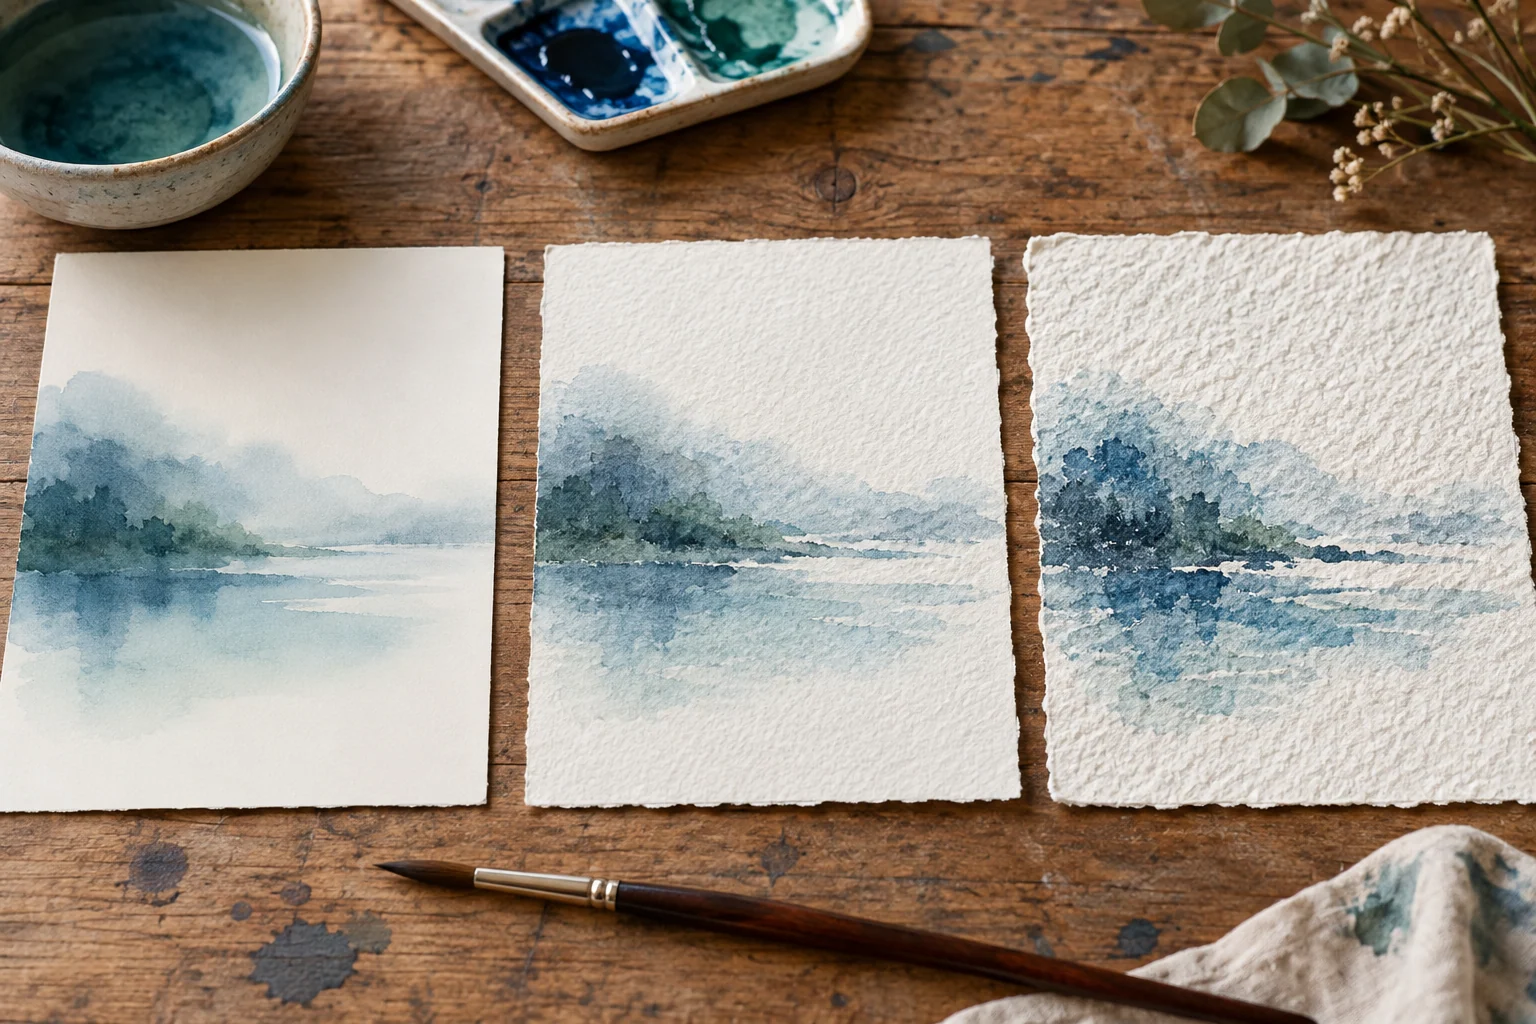
Set up one focused study.
Keep the first attempt small enough to repeat once. Compare decisions instead of judging talent.
- Level
- Beginner
- Practice time
- 35–45 minutes
- Skill focus
- Paper texture, absorbency, edge behaviour
- Success looks like
- Create a labelled comparison sheet showing how the same paint mixture behaves across different paper surfaces.
Materials
- Small samples of two or three watercolor papers
- One familiar transparent color
- Round brush
- Two water jars and cloth
- Pencil for labels
Create a labelled comparison sheet showing how the same paint mixture behaves across different paper surfaces.
Begin with the surface, not the brand name
Hot press is the smoothest of the three common surfaces. Cold press has a moderate tooth, while rough paper has a more pronounced texture. Those names describe surface character; they do not guarantee that every manufacturer will feel identical.
Cut equal samples and label them before painting. Keep the paint, brush, water, angle, and approximate stroke size consistent so the surface is the main variable.
Compare one connected wash
Mix enough paint for all samples. Place the same connected wash on each paper without returning to repair it. Observe how quickly the liquid settles, whether the edge remains open, and how much the texture interrupts the colour.
Judge the dry result, not only the wet shine. Some differences become clearer after the water has evaporated.
Test a firm edge and a softened edge
On dry paper, place one firm stroke. Beside it, soften one edge with a clean damp brush. Compare how easily each surface accepts the transition and whether the pigment moves or stains.
A surface that supports crisp detail may require different timing for broad atmospheric passages. Neither result is automatically better; the useful choice depends on the painting.
Test lifting and dry brush honestly
Let a swatch dry completely, then lift one small area with clean water and a soft brush. Stop before scrubbing damages the fibres. Results vary with paper sizing and pigment staining, so record what actually happened.
Use the side of a nearly dry brush for one textured mark. Rougher papers usually reveal more broken texture because raised areas catch the pigment.
Choose the paper for a specific job
Select one surface for a detailed study, one for a wash-led study, or decide that one paper handles both well enough for your current practice. The test is more useful than buying several full pads based on descriptions alone.
Keep the comparison sheet. Repeat it when you change paper, pigment, or brush rather than assuming the previous result will transfer unchanged.
Diagnose the decision—not your talent.
Common mistakes
Changing paint strength between samples
Prepare one larger mixture and work in a consistent order.
Judging while the paper is still wet
Let every sample dry before comparing value and edge quality.
Calling one texture universally best
Connect the surface choice to the kind of mark or subject you need.
Self-check
- Every sample is labelled.
- The paint mixture stayed reasonably consistent.
- I compared dry edges and texture.
- I chose a surface for a stated reason.
Technical references
LUREXEN independently synthesised this lesson from observation practice and the following education pages. Links are provided for verification; they are not sponsorships.