Drawing / Beginner
Color a Warm Window in a Winter Scene: Keep the Snow Light
Use a small amber window against cool blue surroundings to suggest a cozy evening without filling every snowy area with color.
Choose one light to emphasize
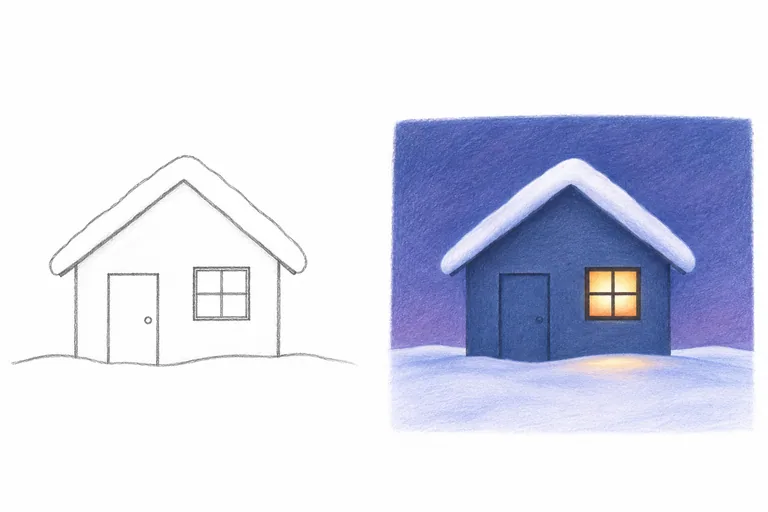
A winter coloring page can feel warmly lit without using bright yellow everywhere. Begin with one small cottage, a snow-covered roof and a single window. Keep the first exercise simple enough that you can judge the light before adding trees, decorations or more houses. Use your own drawing or a coloring page you are allowed to use.
Choose colored pencils in pale yellow, ochre or orange, a quiet blue and a blue-violet or indigo. Add a neutral if needed. Test them on the same paper first. Different papers and pencil types take layers differently; a screen illustration cannot predict the finish of your supplies.
Save the snow before coloring
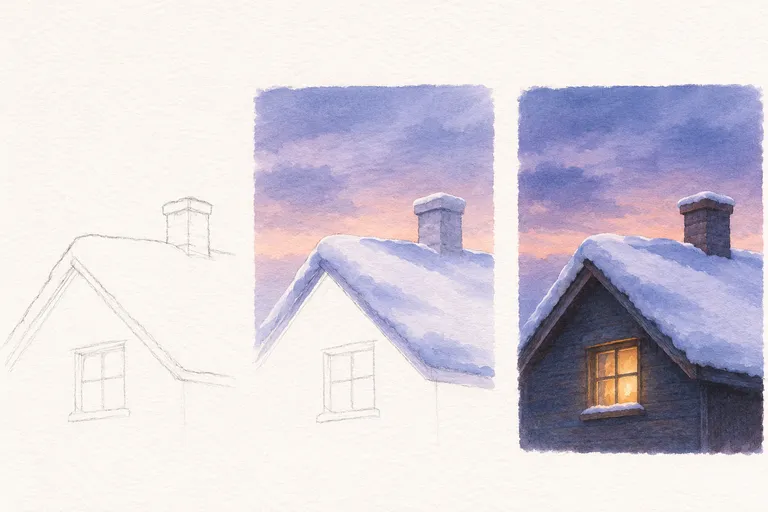
Decide which roof and foreground areas will stay as paper. Put only a very light guide mark where the snow turns into shadow. Leave the broad upper surfaces unfilled at first. This gives you room to decide how much cool color the scene needs.
Lightly shade the sky and wall around the window with cool colors. Build them gradually rather than pressing hard immediately. Keep the edges of the cottage readable, but avoid giving every snowy edge a heavy outline.
Build the window from pale to stronger
Lay pale yellow inside the panes. Add a little ochre or orange near selected edges, keeping the brightest part light. Shade the window frame separately so its bars remain visible. A darker wall beside the light panes will often help more than adding another strong orange layer.
Compare the window with the surrounding wall by squinting. You should see a small light area inside a quieter dark shape. If both are equally pale, deepen the wall in a spare study instead of trying to force brightness into the window.
Use cool shadows sparingly
Add pale blue-violet to the snow’s shaded side and beneath the roof edge. Keep some transitions soft by reducing pressure at their ends. Snow can reflect surrounding colors, but not every surface needs a blue wash. Let the untouched paper carry much of the light.
A faint warm reflection directly below a low window can be a useful stylized choice when the arrangement supports it. Keep it small and weaker than the window itself. Do not send a bright orange glow across distant snow or onto surfaces hidden from the light.
Compare two small versions
Color the same tiny cottage twice: once with no warm reflection on the ground, and once with a faint short reflection. Keep the sky and window the same. Choose the version that makes the light easiest to understand; the reflection is optional.
Check that the snow remains lighter than the wall, the window is the main warm accent and the frame is still visible. For more pencil control, see light layering on coloring pages. Print coloring pages single-sided, and place a protective spare sheet underneath when using materials that may transfer; this lesson is designed for colored pencils rather than alcohol markers.