Coloring / Beginner
Reduce Alcohol-Marker Streaks on Large Coloring Areas
Compare controlled overlapping strokes with interrupted fills, then choose a manageable working area for your paper and marker.
Check the materials before blaming your hand
Patchy marker fills can come from the paper, the ink supply, the nib and the way strokes meet. A printable coloring page adds another variable: the printed line must tolerate the marker. This exercise compares your own setup on a small area before you attempt a whole background.
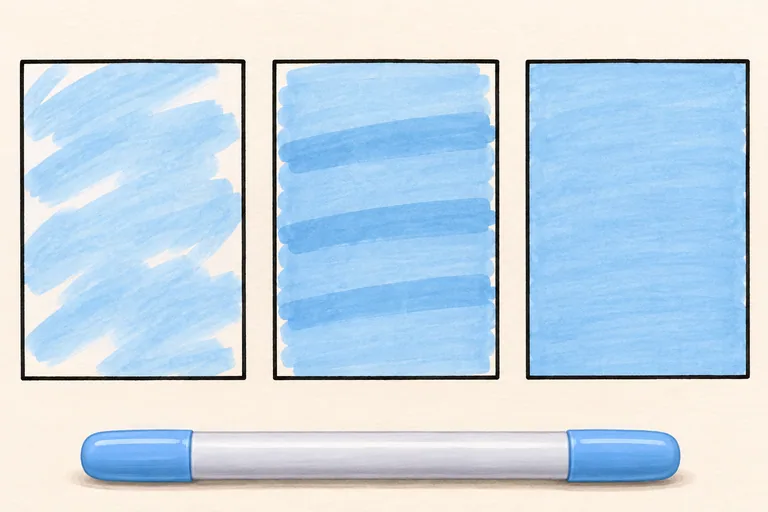
Use one light or middle-value alcohol marker, a printed test on printer-compatible paper and a thick protective scrap beneath it. Print single-sided when bleed-through is possible. Work according to the marker manufacturer's handling guidance. The swatches above are AI-generated explanations of possible effects, not a real comparison or a guarantee of perfectly even coverage.
Test one modest rectangle first
Make three small outlined rectangles on a spare print. Keep the paper, color and shape size the same. If the nib feels unusually dry or the ink skips, address that according to the marker's instructions before testing technique. Pressing harder is not a reliable repair for an exhausted marker.
In the first rectangle, make several separate passes with deliberate gaps. In the second, pause partway before restarting over the edge of the earlier fill. Watch for pale spaces or darker overlap bands. Let the samples settle before judging them.
Try a controlled moving edge
In the third rectangle, work with adjacent strokes that overlap slightly while the neighboring ink is still workable. Use a nib width that suits the shape. A broad nib may help with an open area, while a finer point can handle a narrow section near an outline.
COPIC's gradation tutorial demonstrates overlapping colors before the earlier layers dry. Our single-color rectangle is a separate practice exercise based on observing how adjacent strokes meet. It does not mean you should repeatedly soak the paper or expect every ink-and-paper combination to behave the same way.
Divide a large shape into sensible sections
On a real coloring page, look for natural stopping places: a window frame, a separate wall panel or a clear object boundary. Complete one manageable area before moving to the next. Avoid starting a wide background with a tiny nib if it takes so long that every neighboring stroke has dried before you reach it.
Keep the marker moving at a comfortable, controlled pace. Rushing around corners can send ink outside the outline. Leave a small edge gap initially if your paper allows noticeable sideways spread, then approach it carefully after observing how the ink settles.
Do not fix every streak by adding more ink
Check the front, back and protective scrap. Extra passes can deepen the entire value, spread beyond boundaries or increase bleed-through. A darker second coat may reduce a visible pale gap, but it also changes the color. Test that decision on the spare rectangle first.
Crayola recommends suitable paper, a protective blotter and lighter applications to reduce bleed-through. Even when the front looks smooth, keep the surface beneath protected. Do not assume a thicker sheet automatically solves every marker problem.
Choose the best result your setup supports
Compare the three dried samples at normal reading distance. Keep a note of the paper, marker and approach that worked best. If a wide area remains difficult, choose a design with smaller sections or use colored pencils for that part. Slight natural variation can be acceptable in a handmade coloring page.
For printed-line smearing, sideways feathering or ink passing through the sheet, use the separate alcohol-marker paper test. That lesson diagnoses material compatibility; this one focuses on how a fill is built.