Coloring / Beginner
Color Short Fur with Pencils: Direction Before Hundreds of Hair Marks
Give a simple animal coloring page a soft coat by grouping the light and dark areas before adding a few directional fur marks.
Choose a small area of the coat
On a coloring page, fur can become a dense field of scratches if you start by drawing individual hairs everywhere. Choose one animal head or a small shoulder area with a clear outline. Work on a page you own or have permission to print. A simple short-haired animal is easier to study than a coat full of long curls.
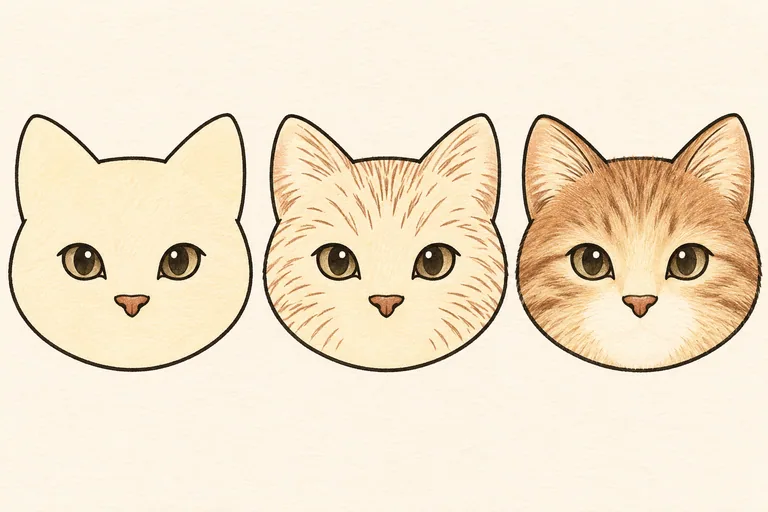
Use colored pencils in a light base color, a middle coat color and a darker related shade. Add a scrap of the same paper for testing. The stages above are AI-generated illustrations of a proposed LUREXEN exercise, not a photographed test or a promise that your pencil set will produce identical results.
Map the direction with a few guide marks
Look at an animal reference you are allowed to use. Notice how the coat changes direction around the forehead, cheeks and muzzle. On a spare outline, place a few arrows outside the shape to remind yourself of that flow. Do not draw dark arrows across the finished coloring area.
Faber-Castell's pet portrait guidance describes following the direction of hair growth with individual strokes and broader marks. Apply that principle selectively here. Cheek marks may spread outward while forehead marks follow a different path. Avoid treating the head as a circular pattern radiating from one invented point.
Establish the pale base and broad shadows
Lay down a light base within the printed outline, preserving the lightest muzzle or forehead areas. Keep the surface open enough for later marks. Then add a gentle middle value where the head turns away from the chosen light or where a cheek sits beneath another form.
Do not darken every printed edge equally. The face should begin to read through broad light and dark groups even before it looks furry. If you are coloring a stylized design rather than a realistic portrait, simplify the shadow plan instead of forcing complicated anatomy into a small cartoon shape.
Add short strokes in small groups
Sharpen the middle-color pencil and try several light, short strokes on the scrap. Let each stroke taper as you lift the pencil. Work in small groups, leaving some base color visible between them. Change the stroke direction gradually as the coat turns around the face.
Keep the marks shorter on a close coat. Long, equally spaced lines can make a short-haired cat look shaggy or striped. Use the darker pencil only in selected recesses, such as a small cheek overlap. A dark mark should strengthen the form or a deliberate coat pattern, not fill a gap simply because it is empty.
Keep facial features separate from fur texture
Protect the eyes, nose and clear muzzle shapes while you work. Fur marks do not need to cross every feature boundary. When the printed design already contains whiskers, leave them readable rather than burying them under additional strokes.
A clean piece of paper beneath your working hand helps keep the pale areas tidy. If a patch becomes too busy, stop and compare it with the quieter side. Adding another dark layer usually increases the texture problem. Try a simpler version on a second copy before committing more pressure to the original.
Check the coat from farther away
At arm's length, you should notice the animal's expression and broad form before the individual hairs. Keep some areas almost untouched, especially where the light is strongest. A few well-placed directional marks can suggest a much larger coat.
For the next attempt, change only the base color or the light direction. Keep the same outline so you can compare decisions. If pressure control is the main difficulty, return to building light pencil layers before adding more fur detail.