Coloring / Beginner
Color Black Objects Without Losing the Details
Build a readable black object with charcoal middle values, reserved light areas and a few selected dark accents instead of one solid black fill.
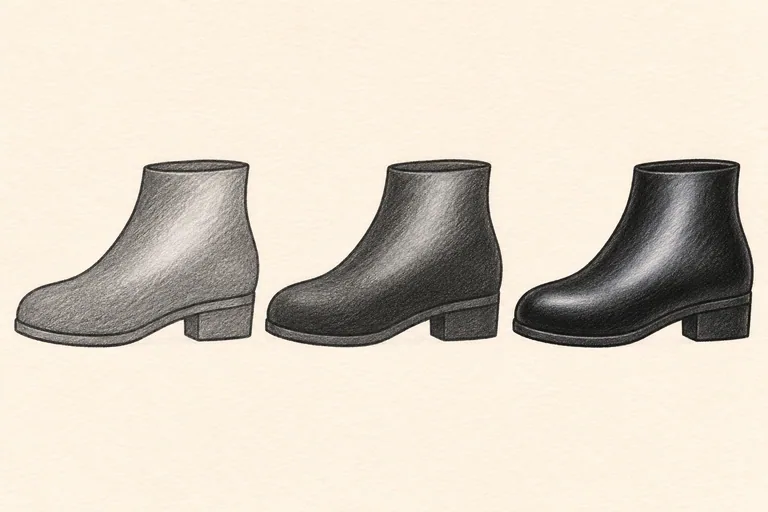
Choose one broad shape and a simple light
A black boot, bag or kettle can lose its shape when every area receives the darkest pencil. Black describes the object's local color; the light falling on it still creates different values. This exercise keeps those differences visible while making the whole object read as black.
Choose an outlined object on a coloring page you own or are permitted to print. Use a charcoal or dark-gray pencil, a lighter gray and black. A muted blue is optional for a cool reflected note. Keep a scrap of the same paper nearby. The boot illustration above is an AI-generated teaching example, not a page promised inside the related workbook or a recorded pencil test.
Reserve the light before applying the dark
Decide where the light comes from. For the boot example, a broad pale area on the upper side can describe the curved surface. Leave it lighter from the beginning rather than filling everything with black and expecting a white pencil to restore it.
Separate the object's main parts. A sole, heel or handle may need its own small value change. You do not need a bright white outline around every section. Make a tiny three-value plan on scrap paper if you find it difficult to decide which area should stay light.
Start with the middle dark
Lay down charcoal or dark gray with light pressure across the main body, working around the reserved light. Build the color gradually. Faber-Castell's coloring guidance describes light-pressure shading as a way to create an even area while retaining the paper structure.
Use this first stage to check the broad form. The object may look gray for a while; that is useful working room. If the shape is unclear before black is added, compare the silhouette and the light-to-dark arrangement rather than increasing pressure everywhere.
Place black only where it earns its place
Add true black to a few selected recesses or turning areas. On a boot, these might include a narrow part beneath an overhang, a darker heel side or a short separation above the sole. Follow the printed design or your reference, not a rule that every edge needs the same dark border.
Keep some middle-dark areas visible between the deepest accents and the light. A large jump from white directly to black can make the surface look divided rather than rounded. Test an additional gentle layer on the scrap before committing it to the finished page.
Keep the surface and surroundings believable
A small cool or warm note can suggest reflected light, but it should remain subordinate to the black body. Avoid adding bright blue stripes merely to make the object more colorful. Matte cloth and polished leather need different edge and reflection treatments, so choose one surface for this study.
Use a restrained contact shadow beneath the object if the scene calls for it. Preserve important printed seams and openings. If a detail becomes buried, stop before adding more black; the next attempt may need a larger reserved light area or fewer dark accents.
Check readability at normal viewing distance
Step back and ask whether you can still identify the main parts. The object should look black overall while retaining its volume and a small number of useful details. It does not need to be the darkest shape in every corner.
Compare a second copy with less black and the same charcoal base. This can reveal how much work the middle values are doing. For a quieter surrounding area, try a soft colored-pencil background. Keep its values subordinate to the main object.