Drawing / Beginner
Draw a Fern Frond: Follow the Curve and Leave Breathing Room
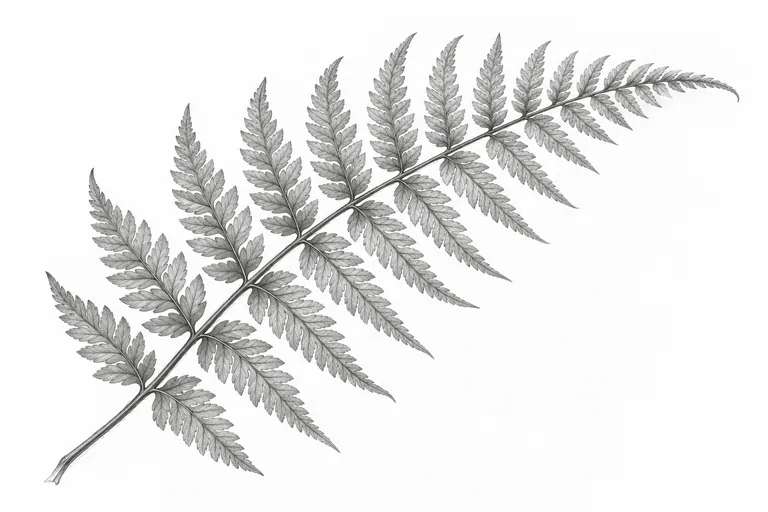
Map the central curve and leaflet groups before drawing tiny details, with a simple spacing check to keep the frond from becoming a rigid ladder.
Observe one frond, not a generic fern
Fern shapes vary. Choose one frond you can observe or a clear photograph you may use. Notice whether the leaflets sit opposite one another, alternate, angle upward or overlap. This lesson simplifies a drawing task; it is not a botanical identification key.
Begin with a large enough sketch that gaps remain comfortable to draw. A tiny detailed frond encourages stiff marks because your hand has no room to change direction.
Map the main curve and width
With a light pencil, draw the central direction from base to tip. It can curve gently or bend more noticeably, depending on the subject. Indicate the widest region with two faint outside guide lines, then let the envelope taper toward the tip.
These guides describe the space the leaflets will occupy. They are not heavy outlines around the finished frond. If the envelope already looks too broad or too regular, compare it again with the reference before proceeding.
Build groups rather than a ladder
- Mark a few attachment points. Begin with widely separated landmarks near the base, widest part and tip. Do not fill every position immediately.
- Set leaflet directions. Use a light gesture from each attachment toward the outside envelope. Check the angle rather than repeating one diagonal.
- Add the larger forms. Let the leaflets vary in length and taper. Some may partially hide others.
- Preserve the gaps. Look at the white wedges between neighboring leaflets. Leave enough room for those shapes to remain readable.
Choose a small area for detail
Once the whole frond reads, choose two or three leaflets to develop further. Indicate a central vein or a slight edge change if it is visible. Let other leaflets stay simpler. A complete botanical plate is a different project from this short observation exercise.
The National Gallery of Art's introductory drawing resources emphasize line and form. The proposed fern study applies those basics through a curve-and-envelope plan rather than asking you to copy a fixed sequence of identical leaves.
Check the rhythm by looking away
Turn from the reference to the drawing and back. Does the widest region sit at the same relative height? Do the gaps become smaller toward the tip? Does the stem's direction still show through the collection of marks?
A rigid ladder: compare the attachment intervals and leaflet angles. A dark comb: use lighter lines and fewer internal details. A blunt tip: simplify its last few forms so the taper is visible. Leave the current sketch alone and apply one change in a second drawing.
Make a silhouette companion
On a separate sheet, redraw the frond as a simple overall silhouette, keeping the largest gaps. Compare it with the detailed version. If the silhouette feels more alive, the next detailed drawing may need fewer interior marks and more attention to its outside shape.