Drawing / Beginner
Draw a Mug Handle by Checking the Space Inside It
Use the opening inside a handle to check its width, tilt and attachment before adding pencil shadows.
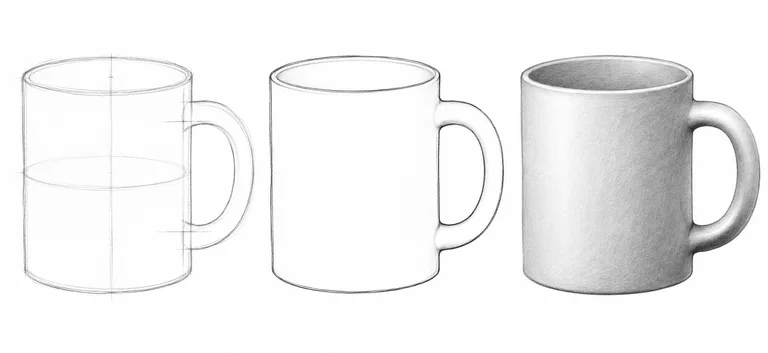
Choose a stable view
Place a plain mug on a table with its handle turned partly toward you. Pick a viewpoint where the opening is easy to see. Keep the mug and your chair in the same positions throughout the exercise. An HB pencil, eraser and ordinary drawing paper are enough.
Begin with the mug body and the ellipse of its rim. Use light lines while checking the relationship between width and height. Resist adding a thick handle immediately. First notice the patch of background visible through it. That opening is the negative space you will use to check the drawing.
Draw the hole before the outer edge
Compare the opening with a familiar simple shape. It may resemble a tilted D, a narrow oval or an uneven rounded triangle, depending on the view. Mark its top and bottom relative to the mug rim and base. Sketch it lightly, then compare its width with the mug body.
Check the tilt by looking at the longest direction through the opening. If it is too upright or too wide, adjust it now. Drawing from the observed gap helps you avoid using a remembered symbol for a mug.
Build the handle around the gap
Add the outer contour around the opening. Keep the thickness consistent with your reference, allowing it to change as the handle turns away. Locate both attachment points. Where the body overlaps the handle, stop the hidden contour rather than drawing a line through the ceramic wall.
Look back at the opening after each correction. Changing the outer shape can make you forget the gap you were using as your guide. The two contours should describe a single solid handle.
Add only a few shadows
Observe where the light comes from. Shade a narrow area under the upper connection and the underside of the handle when those areas are dark in your setup. Build the tone with light passes. Keep the hole itself as the background you see through it; it does not automatically need a black fill.
Darken only the few edges that need emphasis. A uniformly heavy outline can flatten the mug and make the handle look attached as a separate symbol.
Check it from a distance
Compare the opening, the handle thickness and the two joins. If the handle still looks wrong, return to the negative shape before adding more shading. For a second short study, rotate the mug slightly and draw just the new opening and its surrounding contour. Notice which proportions change.