Drawing / Beginner
How to Draw a Mushroom: Cap Tilt, Underside and Stem Connection
Build a pencil mushroom from its outer envelope and visible underside, then add a few gill directions without drawing a striped umbrella.
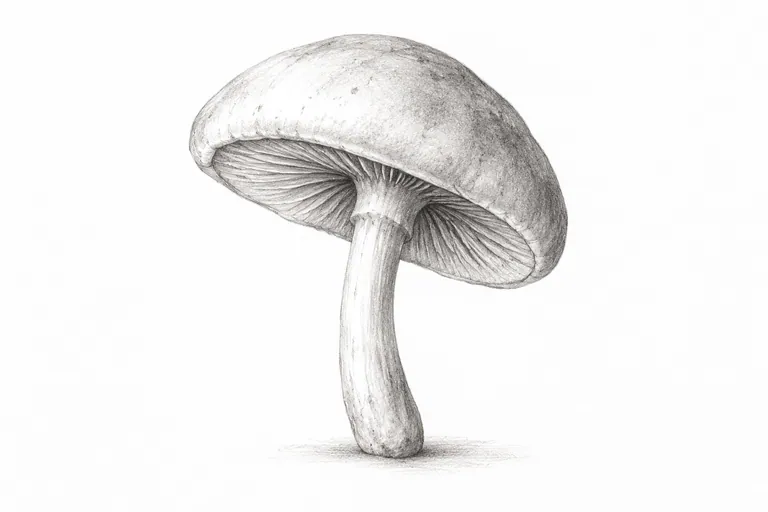
Choose a view with a clear connection
Use a purchased food mushroom, your own photograph or a permitted reference. Look for a view where you can see how the stem enters the cap. A straight side view can hide this connection, making it harder to understand than a slightly tilted view.
This is an observational drawing lesson. It does not identify wild mushrooms or establish whether a specimen is edible. You can practise the same form decisions with a harmless model or photograph.
Draw an envelope before a contour
Use an HB pencil, an eraser and ordinary drawing paper. Lightly mark the highest point of the cap, its farthest left and right points and the lowest point of the visible underside. Connect those landmarks with a loose enclosing shape. Compare its width and height with what you actually see.
Add the stem's direction as a light line. It may curve or lean, and it need not sit at the visual center of the cap. Check the negative spaces on either side of it before making the contour dark.
Explain the underside
- Place the front edge. Draw the nearer cap contour with a light continuous decision, rather than many short corrective scratches.
- Find the visible underside shape. Its depth depends on your viewpoint. Avoid attaching a full oval automatically.
- Connect the stem. Let the stem disappear beneath the appropriate part of the cap. A small overlap is more informative than a heavy outline all the way around.
- Add selective gills. Observe their direction from the attachment region toward the cap edge. Choose a few marks to explain the turn; keep spaces between them.
Use value to separate surfaces
Compare the cap, underside and stem as three broad value families. If the underside is darker in your reference, use a light hatched mass before adding individual gill marks. Let the hatching support that mass instead of making every line equally dark.
Canson explains hatching as a means of building tone with lines. In this exercise, place those lines only where they help distinguish a surface. The exact gill arrangement comes from your reference, not a universal diagram.
Make a stem test
Cover the texture with a scrap of paper so you can judge the silhouette and connection alone. Does the stem seem to support the cap, or look pasted onto its front? If the connection is unclear, draw another small version using contour and one shadow shape only.
Do not erase repeatedly until the paper becomes fuzzy. Keep the first attempt as a record. On the next drawing, change the attachment point or visible underside depth before adding more information.
Try a pair with different tilts
Draw a second mushroom leaning away from the first. Keep their caps different in size. Compare which underside is more visible and where the stems overlap. A short two-object study can reveal whether you are observing the actual tilt or repeating the same familiar mushroom symbol.