Watercolor / Beginner
Make a Botanical Watercolor Page: One Leaf, One Seed Twig
Turn a short nature observation into a clear sketchbook page with two related subjects, pale washes and useful notes.
Choose two subjects that belong together
A botanical page does not need a full border of flowers. Start with one leaf and a short seed-bearing twig from the same observation, or use your own photograph. A fallen specimen can offer a slower subject than a moving branch. Leave protected plants undisturbed and follow local collection rules.
Botanical sketchbooks feature in Pinterest's August 2026 hobbies report. That is a useful source of inspiration, rather than a promise that a particular painting will attract attention. This exercise makes the idea manageable: two observed shapes, a small palette and space to record what you notice.
Plan the page before adding paint
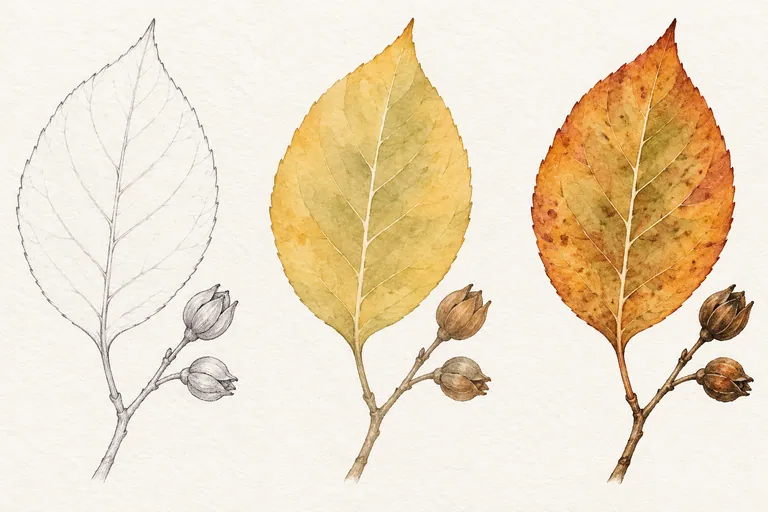
Use watercolor paper, a pencil, a round brush and two or three familiar colors. Lightly place the leaf on the left and the twig on the right. Leave a visible gap between them and a small area beneath for notes. Check that neither subject presses against the page edge.
Draw the outer leaf shape before the veins. Compare its widest point, tip and stem. For the twig, place the seed pods as simple forms before connecting their stalks. The illustration proposes an arrangement; it is not a plant-identification diagram. Record a species name only when you have identified it reliably.
Keep the first washes simple
- Test your colors on scrap. Let a patch dry so you can judge its value on your paper.
- Paint the main leaf shape. Begin with a diluted ochre or green suggested by your specimen. Keep the central vein pale if it is visibly lighter.
- Paint the pods separately. Use a light brown first wash, leaving small light areas where you observe them.
- Allow the study to dry. Decide which edges or overlaps actually need another layer.
Canson describes wet-on-dry painting and dry-layer glazing as ways to keep shapes more defined. Use that approach here for the seed pods; you can try a softer wet passage inside the leaf on a later study.
Add evidence, not a decorative web
Choose a few veins that explain the leaf's direction. Follow their actual spacing and let some marks stop before reaching the edge. Add a darker pod accent where the reference shows a turn away from light or an overlap. Avoid outlining everything with the darkest mixture.
Let the painting dry before writing beside it. Useful notes might describe the leaf's surface, an uneven edge or the direction of the light. Keep observations separate from guesses: “yellow edge” is something you can see; an uncertain species name should stay uncertain.
Compare the page with the specimen
Look first at the silhouette, then the placement of the smaller parts. If the drawing is crowded, make the second version with only the leaf and one pod. If every vein is equally dark, reduce their number and strength next time. More marks are useful only when they explain more.
Repeat the arrangement with another specimen on a different day. Comparing two pages can reveal changes in color and proportion without requiring a complicated landscape. For more help with the individual shape, continue with the watercolor leaves lesson. Your page can remain a personal observation rather than a polished botanical plate.