Watercolor / Intermediate
Paint a Glowing Watercolor Lantern Without Losing the Light Center
Plan a small reserved highlight, a pale warm glass shape and a restrained dark surround before adding the lantern frame.
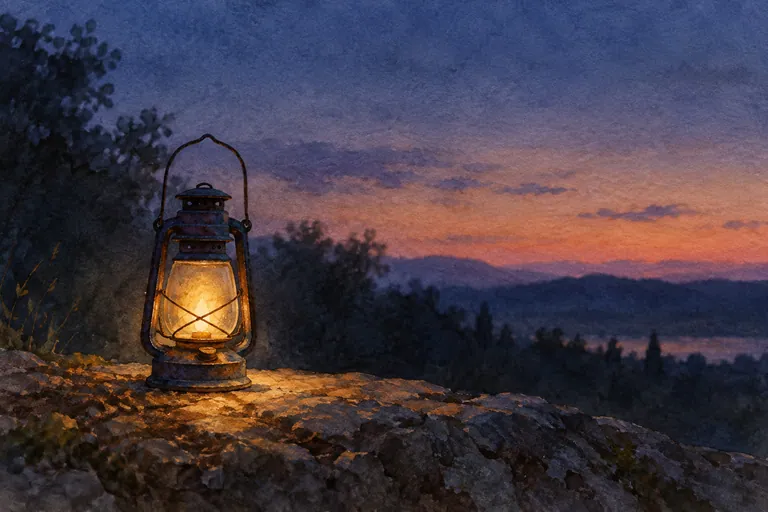
Draw three zones before the metalwork
Begin with the brightest small shape, the glass area around it and the wider surroundings. The bright center should occupy less space than the warm glass; the surroundings should offer enough contrast to make the light readable. The exact balance depends on the reference and the mood you want.
You do not need a lit candle to practise. Use an unlit lantern with your own reference photograph, or an electric light approved for the fixture. Keep painting water, paper and hot light sources separate. The lesson is about a pictorial effect, not operating a lantern.
Test a warm–dark pairing
Use watercolor paper, a round brush and a warm yellow or orange with a dark blue or violet mixture. Paint a pale warm rectangle beside a darker swatch and let them dry. If the dark swatch is nearly the same value as the warm one, changing hue alone will not create much contrast.
Transparent-watercolor practice often relies on keeping selected paper light. That is the approach used here. Opaque highlights can belong to another painting method, but they are not required for this study.
Build the lantern around the reserved center
- Reserve a modest highlight. Lightly outline the brightest shape and avoid painting over it in the first wash. Do not make every glass panel equally white.
- Lay a pale warm passage. Surround the center with a light wash. Keep its boundary simple. The glow should have a shape, not expand accidentally across the whole sheet.
- Develop the surroundings. After checking the drying stage, place a darker area around the lantern. Decide where you want a softer transition and test that transition away from the main study first.
- Add the frame on dry paper. Use a few dark structural marks. Check their direction and spacing against the actual fixture rather than drawing evenly thick bars over every panel.
Keep contrast selective
A halo that is equally soft and equally bright on every side can flatten the lantern. Try keeping one structural edge distinct and allowing another short passage to soften. A handle, roof or base may interrupt the light shape; those interruptions help explain the object.
Step back before adding reflections. If the lantern already reads, a few carefully placed accents may be enough. A second bright window in the background can compete with the main light, so decide whether it supports the story before including it.
Diagnose the dry painting
A flat yellow box: compare the center, glass and surrounding values separately. A thick dark cage: the frame may be doing too much. Simplify it in a second drawing. A pale ring with no clear lantern: check the silhouette and roof before changing the color. These are decisions for a new pass, not reasons to scrub through a finished wash.
Try a controlled comparison
Draw two small lanterns with the same center and glass color. Give one a medium-value background and the other a darker background. Let both dry before judging the glow. Record whether the stronger surround helped, or whether it overwhelmed the quiet mood you intended.