Watercolor / Beginner
Paint a Terracotta Pot in Watercolor: Shape, Rim and One Shadow
Use a simple empty pot to practise a readable oval opening, a warm body wash and a connected shadow without covering the surface in texture.
Start with an empty pot
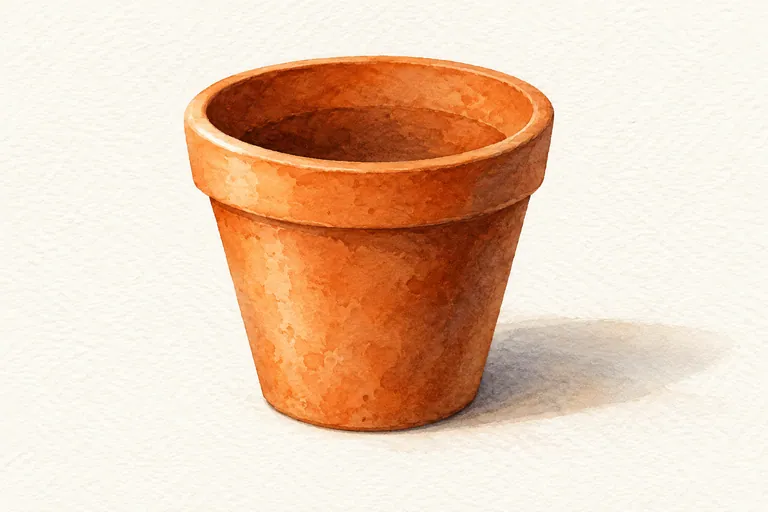
A plant adds many shapes that can distract from the pot itself. Begin with an empty, plain terracotta pot on a simple surface. Place it where you can see a little of the opening. Choose a steady light direction, then keep your viewpoint still while making the first sketch.
The rim is not a symbol you attach to a rectangle. Compare the opening's width with its visible depth, the lip's thickness and the slope of the sides. A real pot may be uneven; you do not need to force it into perfect symmetry.
Check the drawing before mixing paint
Lightly mark the center direction, the widest points of the rim and the base. Draw the oval gently, then compare the left and right halves. Indicate the back inside edge separately from the front lip. If the opening looks twisted, adjust it now while the lines are light.
The National Gallery of Art's drawing resources describe contour as a way to reduce objects to lines and forms. Use that observational approach here: look back at the actual object instead of relying on a remembered flower-pot shape.
Build three readable painted areas
- Lay a light body wash. Mix a warm earth color you already own. Test it first. Paint the body without adding every surface speckle.
- Keep the lip separate. After the first passage dries where necessary, give the front lip a small value difference. Avoid outlining its entire edge with a heavy stripe.
- Describe the opening. Add a darker inside shape, checking which side is actually shaded. Leave the front lip readable against it.
- Connect one cast shadow. Observe its direction and contact with the base. Make the contact area clearer than the farthest edge if that matches your lighting.
Suggest clay without painting every pore
Once the pot reads from a distance, decide whether it needs texture at all. A small broken edge or one dry-brush passage may be enough. Try that mark on scrap before approaching the dry body wash. Let the value changes do most of the work.
Do not darken the whole right side because the illustration happens to use upper-left light. Follow your setup. The generated image is an editorial example, not evidence that all terracotta pots have the same lighting or color.
Check these common problems
A flat orange shape: compare the opening, lip and body values. A pasted-on shadow: check whether it meets the base. A pointed oval: slow down around the side turns and redraw on a separate sheet. Too much texture: make the next study with broad washes only, then add one accent after stepping back.
Repeat the same pot from a lower view
Lower your eye level while keeping a safe, stable setup. Notice how much less of the opening you can see. Draw a second small pot and compare the two rims before painting. This observation is more valuable than memorizing one fixed oval for every container.