Intermediate / Studio practice
Paint a Clear Glass in Watercolor: Highlights, Shapes and Edges
Paint a plain glass tumbler by observing background shapes, reserved highlights and selective dark accents. Keep transparency without a heavy outline.
One focused, repeatable study.
Keep the first attempt small enough to repeat. Your own subject, paper and materials are the reference.
- Level
- Intermediate
- Practice time
- 35–50 minutes, plus drying
- Skill focus
- Transparent subjects, reserved whites and selective edge contrast
- Success looks like
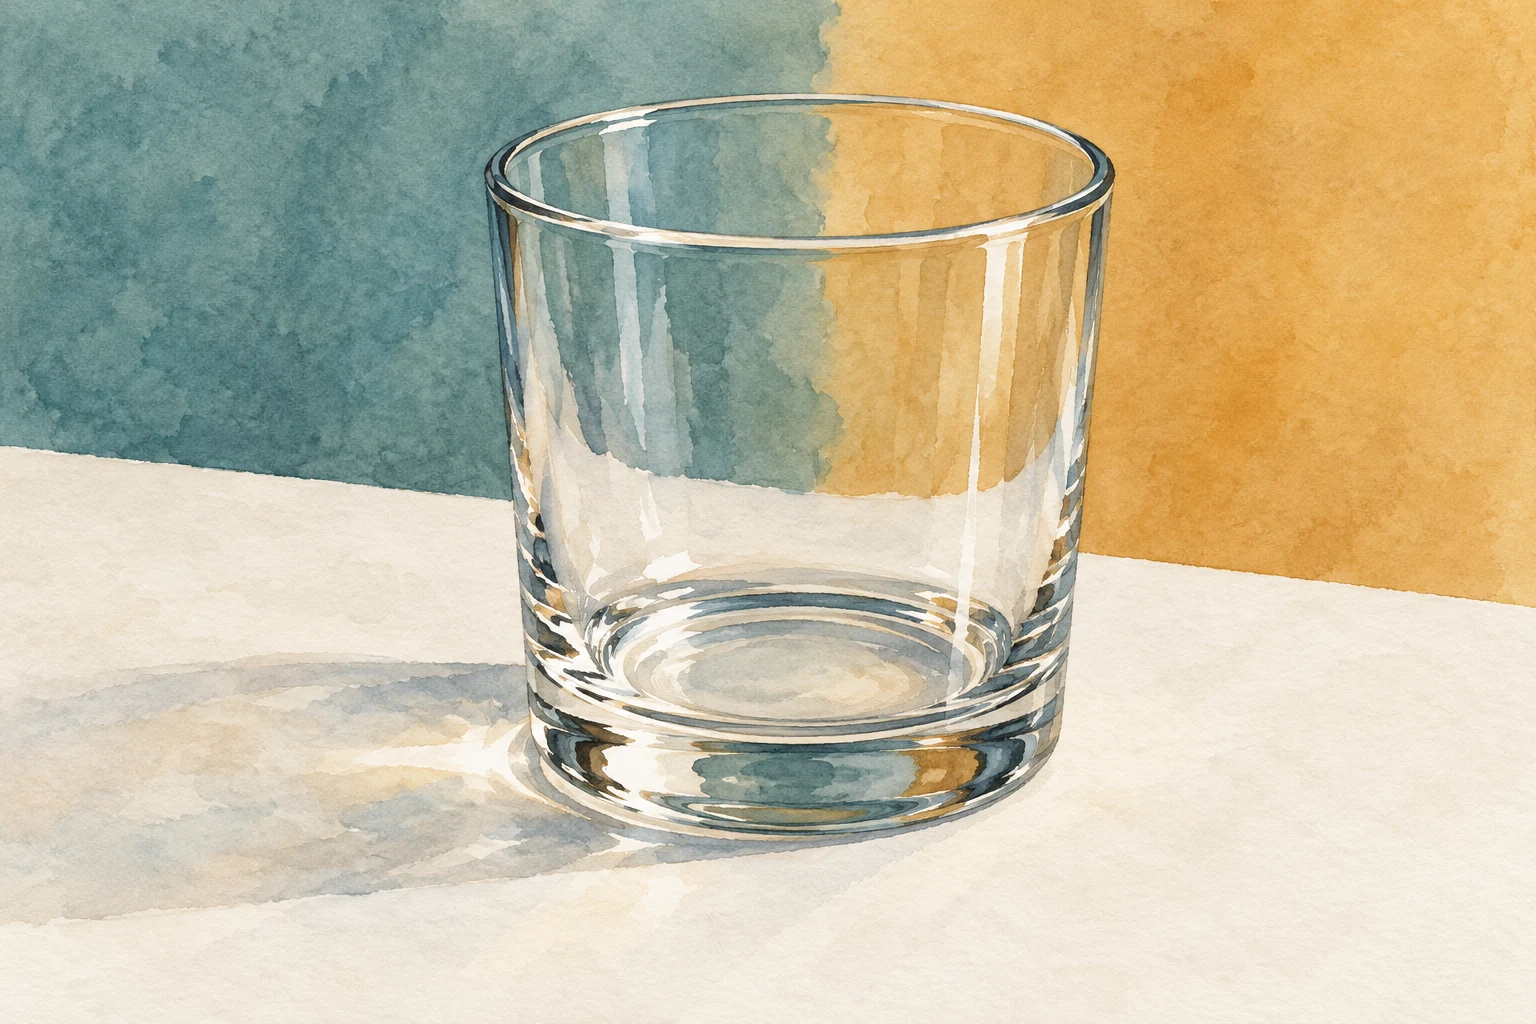
- Make a small tumbler study in which background color remains visible through the glass and a few accents explain its rim and base.
Materials
- One plain, undamaged clear tumbler, handled carefully
- Two broad colored paper shapes behind the tumbler
- Watercolor paper, a pencil and a round brush
- A small palette, water and a cloth
Make a small tumbler study in which background color remains visible through the glass and a few accents explain its rim and base.
Arrange a subject you can read clearly
To paint a clear glass in watercolor, begin with the shapes you can actually see through and around it. Set a plain empty tumbler on a stable pale surface. Put two broad colored paper shapes behind it, such as muted blue and ochre. Choose soft, consistent light and keep the arrangement still.
Avoid cut crystal, elaborate reflections or a glass full of patterned objects for this first study. Use an undamaged object and keep it away from the table edge. This lesson paints the appearance of glass on paper; it does not apply watercolor to glass or reproduce a professional artist’s demonstration.
Draw the envelope and reserve the brightest shapes
Lightly establish the tumbler’s height, width, top ellipse and thicker base. Compare the side angles with your own view rather than assuming that every drinking glass is a cylinder. Mark only the most important white reflection shapes. Keep the drawing faint enough that it does not become a permanent dark border.
Look for the relationship between the inner rim and outer rim where thickness is visible. A small reflection can interrupt either edge. Do not invent matching highlights on both sides because the shape seems symmetrical. The light and surrounding objects, not a universal diagram, determine what appears.
Think in background patches rather than a glass-colored fill
Identify the large colored shapes behind the tumbler and compare how their edges appear through it. Some may shift or change width. Make a tiny color note on scrap, keeping the mixtures pale enough that untouched paper can remain the brightest area.
The public Lorraine Watry course description linked below emphasizes seeing abstract reflection shapes. Use that observation principle with your own arrangement. Her paid lessons and reference materials are not reproduced here. The generated editorial illustration suggests a possible study, not the optical behavior of your particular glass.
Paint a few light passages and leave white interruptions
Paint the broad background patches and the related pale shapes seen within the tumbler, working around the planned whites. Keep the first pass simple. You do not need to wet every part of the sheet or fill the whole glass with an even blue-gray wash. That can make a transparent subject read as an opaque cup.
Let each adjacent passage dry when you need a clear boundary. If a highlight is too small to avoid comfortably, enlarge the whole study on a new scrap rather than squeezing a wet brush into an impossible gap. This exercise needs no masking fluid; preserving a few generous whites is enough for the first attempt.
Choose a few dark accents at the rim and base
After the light passages are dry, look again for the strongest small darks. They may appear at part of the rim, the thicker base or a reflection boundary. Add only the fragments you can locate. Keep gaps between them so the eye can complete an edge without a continuous outline.
Include the observed cast shadow or contact accents on the table, but do not assume that clear glass makes a simple uniformly dark oval. Refraction and the light setup can complicate it. For this study, describe the largest readable shadow shape and leave complex light patterns for a later attempt.
Test transparency by simplifying the result
Stand back and compare the painted background outside the glass with the colors seen through it. Do they still feel related? If the inside has become a separate solid shape, repeat the study with fewer darks and more paper left visible. Darkening the complete outline is unlikely to restore transparency.
Write down which three accents did the most useful work. Repeat the subject with a different broad background shape while keeping the glass and viewpoint still. The next challenge is to observe what changes, not add decorative shine. Continue with the glazing lesson to practice altering selected dry passages without repainting everything.
Change one decision, not everything.
Common mistakes
The glass becomes a solid blue shape
Preserve background relationships and leave generous paper-white interruptions.
A dark outline runs around the whole subject
Replace it with observed rim and base fragments separated by gaps.
Highlights are added symmetrically from memory
Locate each one in the actual setup before painting around it.
Think it through
Try answering these questions in your own words, then open each answer to compare. Use the self-check below to review your actual study.
How can background patches help describe clear glass?
Identify the large colored shapes behind the tumbler and compare how their edges appear through it. Some may shift or change width. Make a tiny color note on scrap, keeping the mixtures pale enough that untouched paper can remain the brightest area.
Practice step: Think in background patches rather than a glass-colored fill
Where should strong dark accents be placed?
After the light passages are dry, look again for the strongest small darks. They may appear at part of the rim, the thicker base or a reflection boundary. Add only the fragments you can locate. Keep gaps between them so the eye can complete an edge without a continuous outline.
Practice step: Choose a few dark accents at the rim and base
Review your own study
Tick what you can observe in your work. If a point is unclear, open its practice reminder. Choose one point to focus on next.
Tick a point only when you can observe it in your study.
Choose one focus for your next attempt using the circle beside a point.
This is your own reflection, not an assessment of your artwork. Choices are not saved or uploaded and reset when this page reloads.
Further learning and source context
This is an original LUREXEN exercise. The sources below provide material or concept context; they do not document the exact study pictured above. No publisher artwork was reused.
- Lorraine Watry Studio: Painting Glass — public course description ↗ — The public overview discusses observing abstract reflection shapes. Paid video instruction was not accessed or reproduced.