Beginner / Christmas studio
How to Draw a Pine Cone in Pencil: Shape, Overlap and Shadows
Draw a pine cone without outlining every scale. Use a tapered shape, overlapping rows and grouped shadows for a clear winter pencil study.
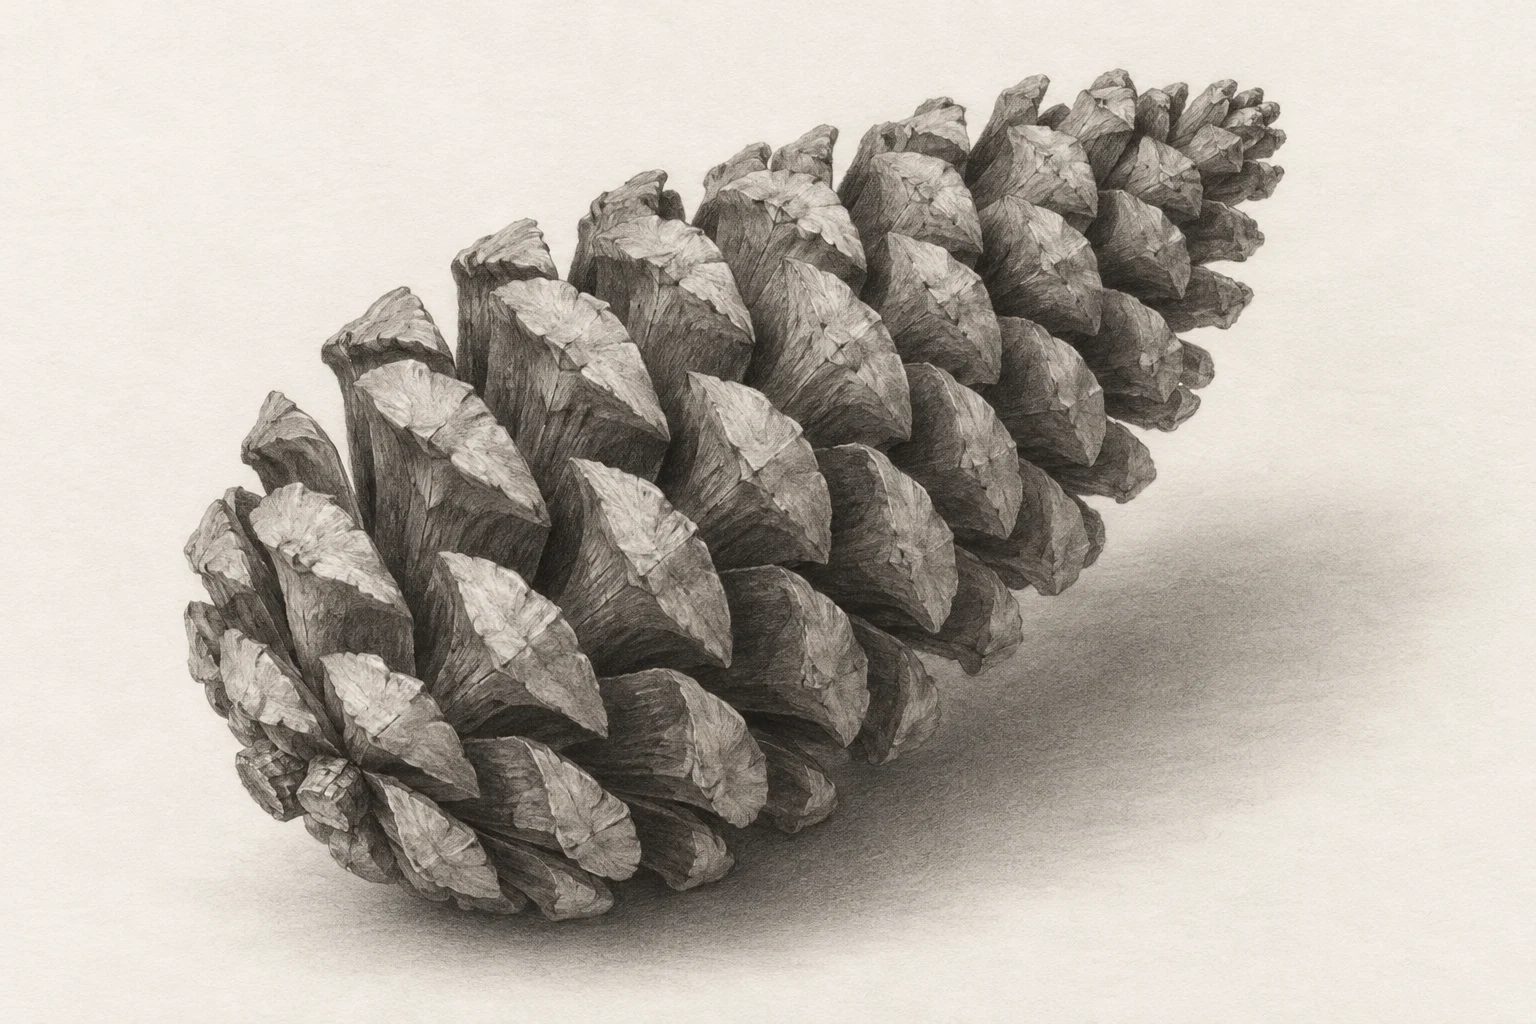
One focused seasonal study.
Keep the first attempt small enough to repeat. Your own subject, paper and materials are the reference.
- Level
- Beginner
- Practice time
- 25–35 minutes
- Skill focus
- Tapered volume, overlapping forms and grouped values
- Success looks like
- Draw a pine cone whose scales wrap around a tapered body instead of forming a flat checkerboard.
Materials
- Drawing paper, an HB pencil and an optional softer pencil
- An eraser and sharpener
- A dry pine cone or your own clear reference photograph
- One steady side light and scrap paper for value tests
Draw a pine cone whose scales wrap around a tapered body instead of forming a flat checkerboard.
Choose an angle that makes overlap visible
Place a dry pine cone on a stable surface with its tip pointing slightly away from you. Use one side light and keep the setup still. A photograph you own is also suitable. Avoid a view straight into the base for the first attempt: a side or three-quarter view makes the tapered body and overlapping scales easier to compare.
Study the silhouette before counting scales. Cones vary by species and by how open they are, so there is no universal scale pattern to memorize. Find the widest part, the tip and the attachment end. Leave space on the page for the cast shadow. A small study about the length of your hand is enough.
Build a tapered envelope and a centerline
Draw a faint envelope around the whole cone: usually a rounded, tapered form rather than a sharp triangle. Add a curved centerline along its length. Compare the width at the broad end with the total length. Correct this proportion while the drawing is still light; extra texture will not repair a cone that is too narrow or too symmetrical.
Mark three or four cross-contour guides across the body. Let them bend around the volume instead of crossing it as straight ladder rungs. These are temporary construction aids, not botanical measurements. Their spacing should respond to the chosen view. Near the far side, forms become less exposed and the visible gaps often narrow.
Place a few scales before filling the surface
Choose several clearly visible scales near the front as anchors. Describe each as a small projecting plate with a tip, an upper surface and an overlap beneath it. Their shapes may be rounded, angular or broken in your specimen. Keep the drawing tied to what you can actually see rather than repeating one decorative diamond everywhere.
Fit neighboring scales around those anchors in staggered groupings. Let some disappear behind others. At the sides, turn their visible surfaces away and interrupt the outer edge selectively. Do not force every row to align or every gap to match. Stop once the overlap is readable; you do not need to trace every scale to establish the form.
Group the shadows before adding small dark gaps
Squint at the cone and separate a light group, a middle group and a darker side. Test these values on scrap, then lay in a light middle tone with gentle pencil passes. Keep upward-facing surfaces lighter where they catch your chosen light. A scale's thickness and angle affect its shadow, so not every underside needs the same black mark.
Deepen a few occluded gaps where one scale blocks another. Concentrate the darkest accents in selected places rather than surrounding every plate. Preserve a broader light-to-dark organization across the whole cone. If all gaps have equal contrast, the texture can overpower the volume and make the cone look like a tiled pattern.
Connect the cone to the surface
Observe the cast shadow's actual shape and direction before drawing it. Begin with a pale mass, then deepen the contact where the cone meets the surface. Let the shadow be quieter away from that contact if the setup supports it. Do not surround the cone with a uniform gray halo: it needs one understandable relationship to its ground.
Return to the silhouette and strengthen only a few edges. A sharp near scale can sit beside a lighter, less explicit far edge. Lift stray construction lines gently rather than erasing through the finished tones. Add cracks or tiny surface marks only where they clarify the material, not as a substitute for a readable overall structure.
Use a second thumbnail to test the volume
Draw a second cone in five minutes using only the envelope, curved guides and three value groups. Omit most individual scales. Compare it with the longer study. If the thumbnail feels more rounded, simplify the detailed version by connecting some midtones and leaving fewer isolated dark gaps.
For another session, rotate the same cone slightly and compare what changes: silhouette width, exposed scale surfaces and cast shadow. Keep the lighting fixed so you are testing viewpoint rather than several variables at once. Write one specific observation beside both drawings. This winter subject can become a festive composition later, but the learning goal here is believable overlap.
Change one decision, not everything.
Common mistakes
The cone looks like a checkerboard
Stagger the visible scales and interrupt rows according to the reference.
The texture is detailed but flat
Reestablish the broad light, middle and dark groups before refining gaps.
Every scale has a black outline
Reserve the darkest marks for selected occluded overlaps.
The object floats
Compare the contact area and the actual cast-shadow shape.
Think it through
Try answering these questions in your own words, then open each answer to compare. Use the self-check below to review your actual study.
What should I establish before drawing small scales?
Draw a faint envelope around the whole cone: usually a rounded, tapered form rather than a sharp triangle. Add a curved centerline along its length. Compare the width at the broad end with the total length. Correct this proportion while the drawing is still light; extra texture will not repair a cone that is too narrow or too symmetrical.
Practice step: Build a tapered envelope and a centerline
How can I keep the small dark gaps under control?
Squint at the cone and separate a light group, a middle group and a darker side. Test these values on scrap, then lay in a light middle tone with gentle pencil passes. Keep upward-facing surfaces lighter where they catch your chosen light. A scale's thickness and angle affect its shadow, so not every underside needs the same black mark.
Practice step: Group the shadows before adding small dark gaps
Review your own study
Tick what you can observe in your work. If a point is unclear, open its practice reminder. Choose one point to focus on next.
Tick a point only when you can observe it in your study.
Choose one focus for your next attempt using the circle beside a point.
This is your own reflection, not an assessment of your artwork. Choices are not saved or uploaded and reset when this page reloads.
Further learning and source context
This is an original LUREXEN exercise. These manufacturer education pages support general material, value or perspective decisions; they do not document the exact study pictured above. No publisher artwork was reused.