Beginner / Christmas studio
Snowy Christmas Tree Watercolor: Preserve White Snow and Build Depth
Paint a small snowy Christmas tree with reserved paper, broken green shapes and cool shadows. A beginner watercolor study with a repeatable practice plan.
One focused seasonal study.
Keep the first attempt small enough to repeat. Your own subject, paper and materials are the reference.
- Level
- Beginner
- Practice time
- 25–35 minutes, plus drying
- Skill focus
- Reserved lights, irregular branch groups and value contrast
- Success looks like
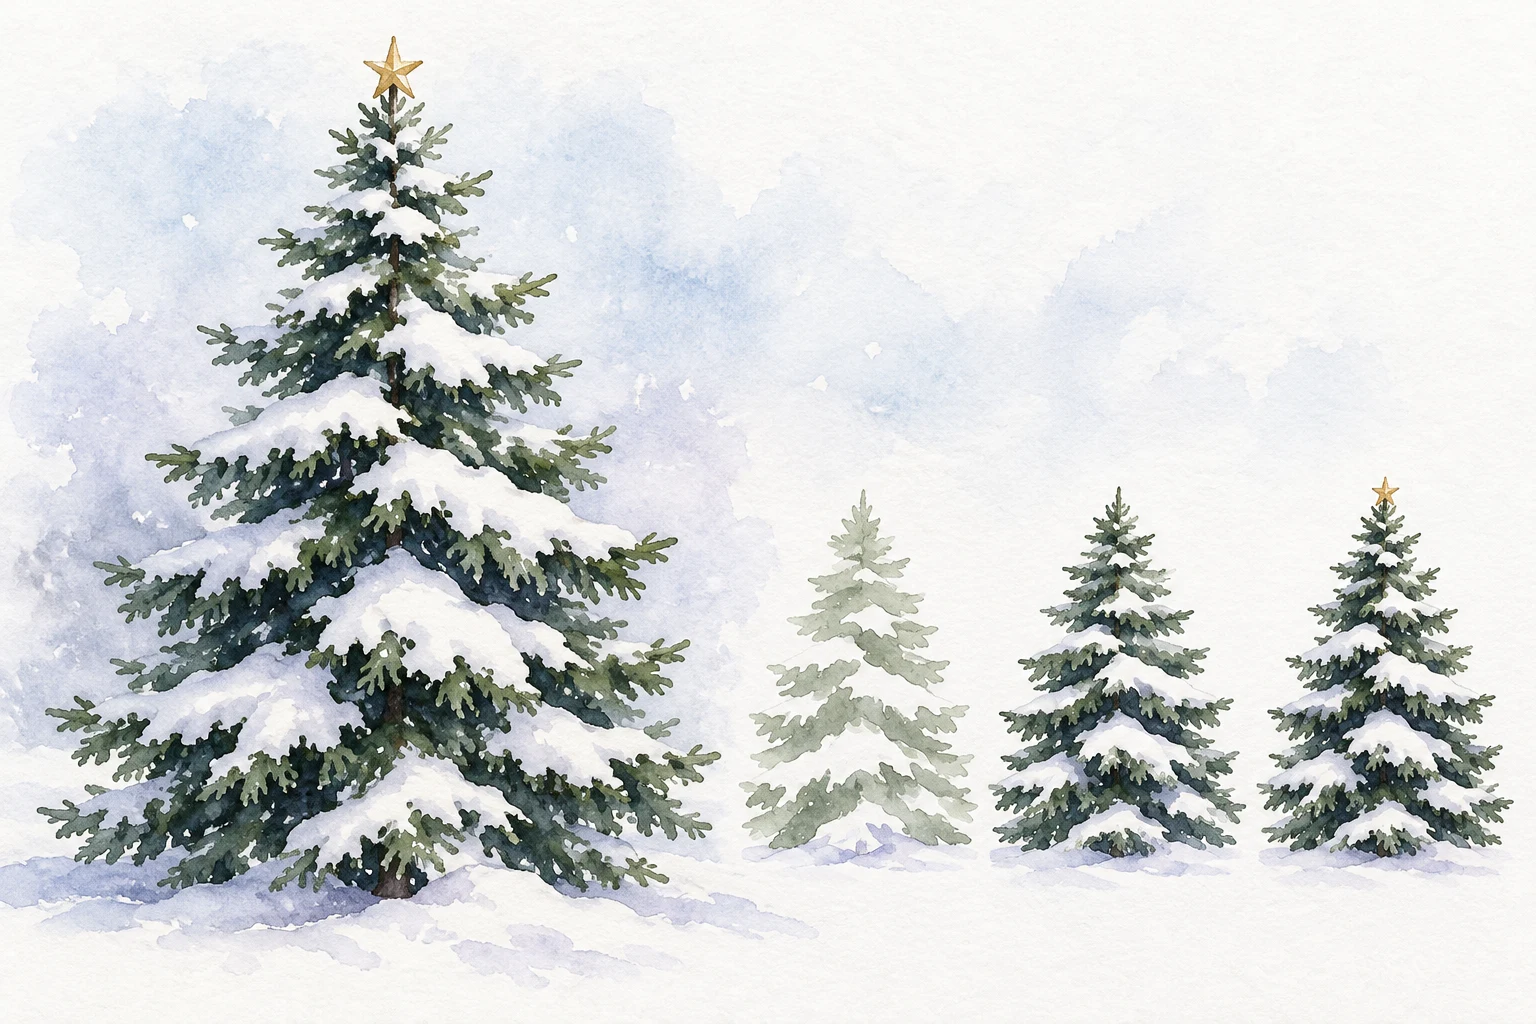
- Paint one tree whose snow shelves remain light while darker foliage explains the branches beneath them.
Materials
- Watercolor paper suitable for wet washes
- One pointed round brush and a small mixing palette
- A blue and yellow for green, or a familiar premixed green
- An optional warm earth color and a cloth
- Clean water, a pencil and a scrap of the same paper
Paint one tree whose snow shelves remain light while darker foliage explains the branches beneath them.
Plan the snow before you paint the green
Begin with a study about the size of your palm, not a full forest. Lightly mark the tree's highest point, widest lower branches and a short trunk. Connect these with an uneven triangular envelope. Leave the two sides different: paired, identical branches can make the tree look like a diagram instead of a growing subject.
Plan four or five broken shelves where snow rests above the foliage. These are areas to leave as paper, not white stripes to outline later. Make their ends irregular and vary their lengths. A small tree should still read when you squint, before you add a star or individual needles.
Test a light green and a darker accent
Prepare two small puddles before working on the tree. The first should make a pale green mark; the second should dry noticeably darker. Test both on scrap watercolor paper and wait for the swatches to dry before judging their separation. Your pigments, dilution and paper determine the result, so there is no universal mixing ratio.
Keep an optional blue-violet snow-shadow mixture very dilute. Its job is to suggest a turn or a depression, not to color every white area. Set aside a clean portion of the palette and fresh water for this mixture; a brush carrying green can contaminate the light snow very quickly.
Build broken foliage around the light shelves
For this controlled exercise, start on dry paper. Use the pale green mixture to place short, uneven branch groups beneath the planned snow shelves. Work from a small top cluster toward wider lower groups. Let some touches meet and leave others separate. Do not fill the envelope as one solid triangle.
Check the paper gaps after each group. If a shelf has become too narrow, stop adding green beside it. A reserved light is easiest to protect before it disappears. Let this first pass dry before returning with a darker mixture; repeatedly brushing a half-drying passage can disturb the wash and produce unwanted marks.
Use dark accents to support the snow
Place selected darker touches directly below some snow shelves and near a few branch junctions. Keep part of the first pale layer visible. The contrast below a light shelf helps it read as snow above foliage, while varied accents prevent every branch from becoming equally heavy.
Choose one side to carry slightly more dark value, but avoid covering that side completely. Add a short trunk only where it helps connect the tree to the ground. Compare the outer silhouette again before painting needles: a clearer branch group will usually help more than a dozen tiny strokes.
Keep the ground and festive detail quiet
Place a restrained cool shadow beside the base, keeping most of the snow-covered ground light. If your imagined illumination comes from the upper left, put the main cast-shadow suggestion toward the right. This simple lighting agreement is more useful than a decorative band of blue around the entire tree.
Allow the paint to dry before adding an optional tiny star or a few small ornament marks. Test the decoration on scrap first. If you need a dark snowy background, practice it in a separate study rather than painting a risky wash around a nearly finished tree. A quiet white background is a complete design choice, not an unfinished painting.
Repeat the study with one useful change
On separate watercolor paper, draw two small tree envelopes. In the first, practice leaving snow gaps with only the pale green mixture. In the second, keep the same shape and add selected dark touches after drying. Compare them from arm's length: can you identify the snow shelves without reading a caption?
Name one visible problem, then repeat only that decision. If the tree is striped, vary the gap lengths. If it is a solid triangle, break up the foliage groups. If the snow looks gray, use cleaner water and fewer shadow touches. Keep a brief note beside the study so the next attempt begins with evidence rather than another guess.
Change one decision, not everything.
Common mistakes
Every branch looks identical
Vary branch lengths, gaps and edge rhythms; preserve one readable overall envelope.
The snow has disappeared
Reserve larger light gaps in the next study; do not scrub the current sheet to force it back to white.
The tree looks flat
Use a few darker branch accents while retaining the first light layer.
The paper becomes patchy
Let the wash dry before another crisp pass and reduce repeated brushing.
Think it through
Try answering these questions in your own words, then open each answer to compare. Use the self-check below to review your actual study.
How can I keep snow lighter than the foliage?
For this controlled exercise, start on dry paper. Use the pale green mixture to place short, uneven branch groups beneath the planned snow shelves. Work from a small top cluster toward wider lower groups. Let some touches meet and leave others separate. Do not fill the envelope as one solid triangle.
Practice step: Build broken foliage around the light shelves
How can I choose a useful change for a repeat?
On separate watercolor paper, draw two small tree envelopes. In the first, practice leaving snow gaps with only the pale green mixture. In the second, keep the same shape and add selected dark touches after drying. Compare them from arm's length: can you identify the snow shelves without reading a caption?
Practice step: Repeat the study with one useful change
Review your own study
Tick what you can observe in your work. If a point is unclear, open its practice reminder. Choose one point to focus on next.
Tick a point only when you can observe it in your study.
Choose one focus for your next attempt using the circle beside a point.
This is your own reflection, not an assessment of your artwork. Choices are not saved or uploaded and reset when this page reloads.
Further learning and source context
This is an original LUREXEN exercise. These manufacturer education pages support general material, value or perspective decisions; they do not document the exact study pictured above. No publisher artwork was reused.
Keep a small Christmas painting habit.
The LUREXEN Advent workbook is an optional 24-project companion. The free lesson above stands on its own; you do not need a purchase to practice it.
Explore the Christmas Advent workbook →