Beginner / Studio practice
Two-Point Perspective for Beginners: Draw a Box From a Corner
Construct a simple box with two vanishing points on one horizon. Keep verticals upright, check both edge families, and avoid a cramped corner view.
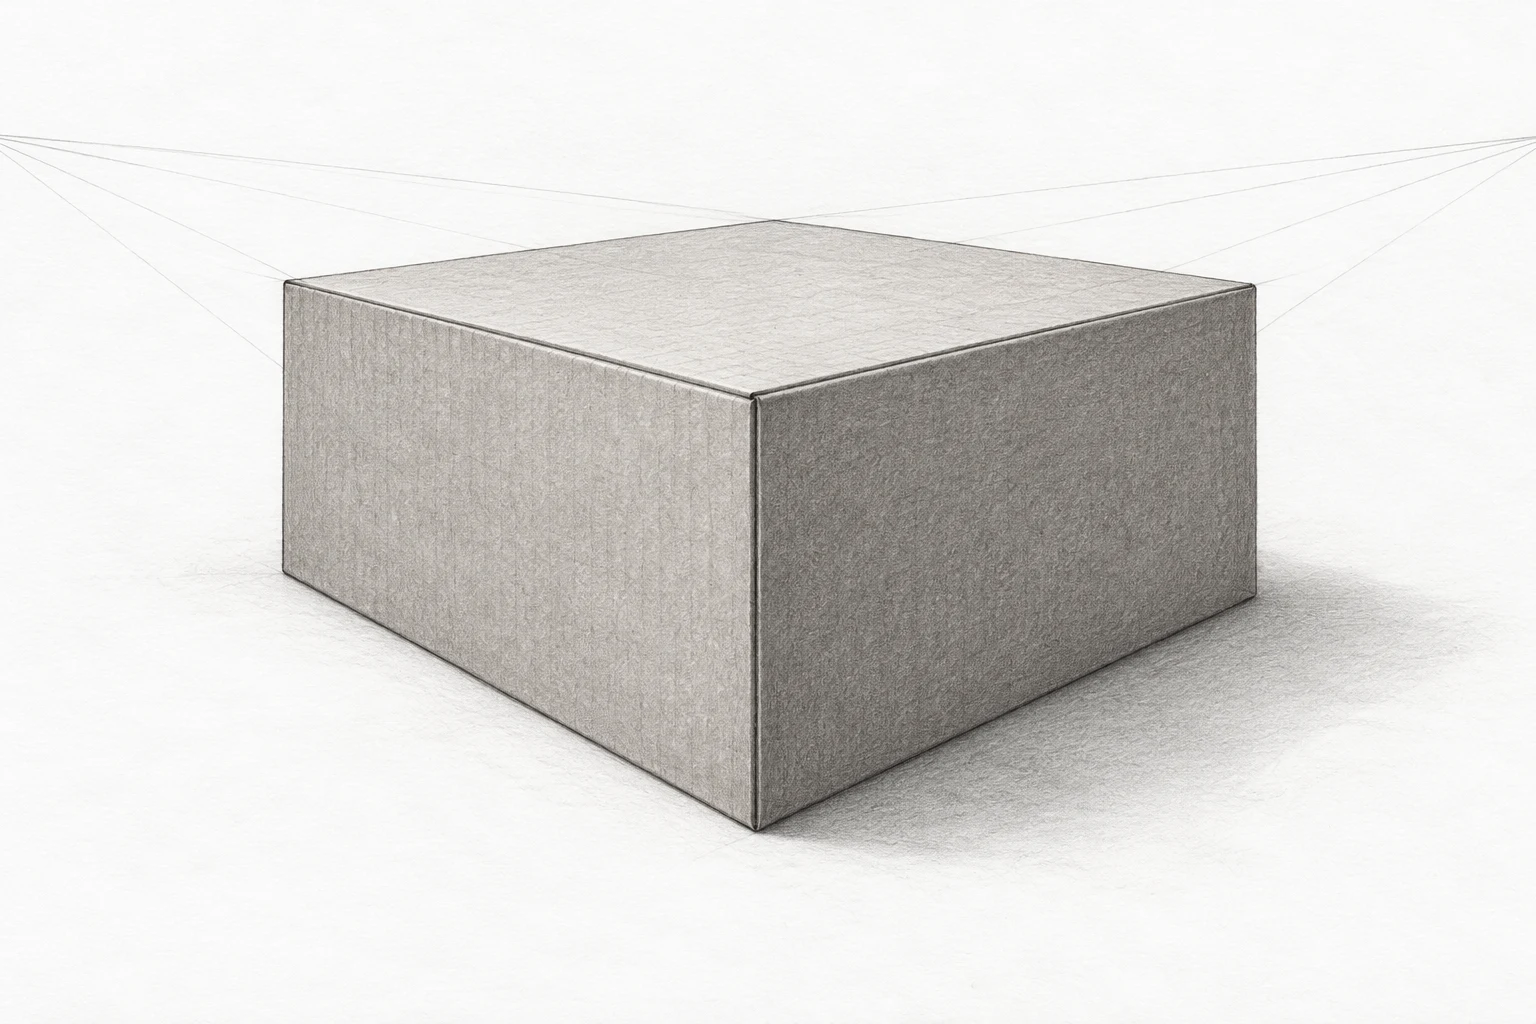
One focused, repeatable study.
Keep the first attempt small enough to repeat. Your own subject, paper and materials are the reference.
- Level
- Beginner
- Practice time
- 30–40 minutes
- Skill focus
- Two edge families, level-view construction and plane closure
- Success looks like
- Construct one box below the horizon whose two horizontal edge families converge consistently and whose vertical edges stay upright.
Materials
- Drawing paper and a larger backing sheet if needed
- An HB pencil, eraser and ruler
- A plain rectangular box for observation, optional
- A stable work surface
Construct one box below the horizon whose two horizontal edge families converge consistently and whose vertical edges stay upright.
Choose a level corner view, not a tilted-camera setup
Two-point perspective is useful when a rectangular box is viewed toward a corner and neither horizontal face is squarely front-on. Its two horizontal edge families recede toward different vanishing points. In the level-view version used here, vertical edges stay upright. This is not the construction for looking steeply up or down.
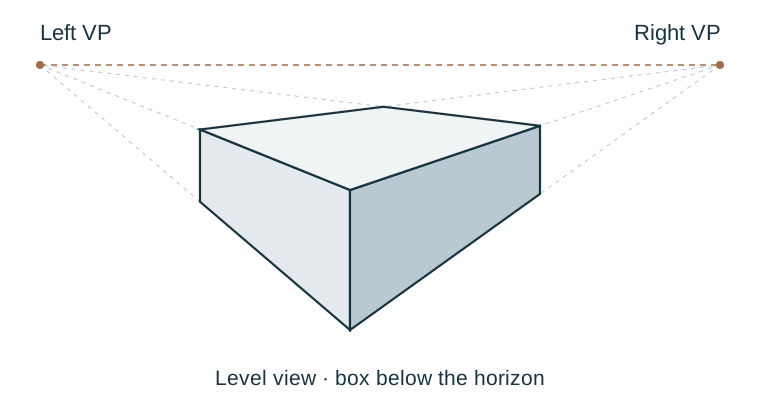
The STAEDTLER course overview introduces two-point practice through boxes before more complex volumes. Our exercise deliberately stops at one plain box. Build that clearly before adding windows, roofs or texture. The generated picture is editorial reference, not a measured construction diagram to trace.
Place both vanishing points on one horizon
Draw a light horizontal line above the space intended for the box. This represents eye level in the construction. Mark a left and a right vanishing point on that same line. Keep them well separated, using a larger backing sheet to support points outside the final drawing area if necessary.
Crowded points can make the box appear aggressively wide-angle. There is no universal page-width spacing for every composition. Begin with a modest box between comfortably separated points, then compare the result. Do not put one point higher simply to make the two sides look different; that changes the assumed geometry.
Draw the near corner and send edges to each point
Below the horizon, draw one upright segment for the nearest vertical corner. From its top and bottom, draw light guides toward the left point and toward the right point. These form two separate families. Keep the ruler aligned with the intended point rather than estimating each edge independently.
Choose where the left face and right face end along the guides. Draw an upright segment at each chosen limit, connecting the corresponding top and bottom guides. You have now established the two visible side faces. Their page widths can differ; equal physical box sides need not look equal in a corner view.
Close the top using the opposite edge families
From the top of the left outer vertical, draw a guide toward the right vanishing point. From the top of the right outer vertical, draw a guide toward the left vanishing point. Their intersection defines the back corner of the top face. Darken only the segments needed to close the visible top.
Do not join those outer corners with an arbitrary horizontal line. Each top edge belongs to one of the two established families. If the guides do not meet where a plausible top should be, check which point each line used before adjusting the box by eye. Keep hidden construction faint rather than presenting every guide as a visible edge.
Audit the structure before shading the planes
Extend a few visible edges lightly to check their destination. Left-family edges should agree with the left point, right-family edges with the right point. The three visible verticals should remain upright and parallel on the page. Erase or lighten unnecessary guides once these checks pass.
Separate the top and two sides with restrained values if you want, using a single imagined light direction. Keep texture out of this first study. A strongly shaded box can still have inconsistent convergence; correct that before making the planes look finished. The box is below eye level, so its top is visible in this setup.
Repeat by changing one width, not the entire system
Make a second small box with the same horizon and vanishing points. Keep a similar near corner and alter one face width. Rebuild the outer corners and top intersection using the same method. Compare how much of each side becomes visible without moving the vanishing points to fit your preference.
This is a drawing construction, not a claim that all real objects in a scene share one pair of points. Rotated boxes can require different horizontal vanishing points. For now, stop when the visible planes close consistently and you can name both edge families. Return to one-point perspective to compare a front-facing room with this corner-facing box.
Change one decision, not everything.
Common mistakes
One vanishing point is placed higher without a reason
Keep both on one horizon for this level-view setup.
The top is closed with an arbitrary horizontal edge
Use the opposite vanishing-point guides to locate its back corner.
Shading hides disagreement between edges
Audit both families and the upright verticals before adding tone.
Think it through
Try answering these questions in your own words, then open each answer to compare. Use the self-check below to review your actual study.
Where do the two vanishing points belong?
Draw a light horizontal line above the space intended for the box. This represents eye level in the construction. Mark a left and a right vanishing point on that same line. Keep them well separated, using a larger backing sheet to support points outside the final drawing area if necessary.
Practice step: Place both vanishing points on one horizon
How can I check upright edges?
Below the horizon, draw one upright segment for the nearest vertical corner. From its top and bottom, draw light guides toward the left point and toward the right point. These form two separate families. Keep the ruler aligned with the intended point rather than estimating each edge independently.
Practice step: Draw the near corner and send edges to each point
Review your own study
Tick what you can observe in your work. If a point is unclear, open its practice reminder. Choose one point to focus on next.
Tick a point only when you can observe it in your study.
Choose one focus for your next attempt using the circle beside a point.
This is your own reflection, not an assessment of your artwork. Choices are not saved or uploaded and reset when this page reloads.
Further learning and source context
This is an original LUREXEN exercise. The sources below provide material or concept context; they do not document the exact study pictured above. No publisher artwork was reused.
- STAEDTLER: Drawing in Perspective with Dan Beardshaw ↗ — Official course overview for horizon, vanishing points and box practice. Videos were not reviewed; this written construction is original.