Watercolor / Beginner
Paint a Watercolor Mushroom: Choose Cap Edges Before Adding Texture
Use one mushroom study to compare a crisp silhouette, a softer turn and a simple underside shadow before adding woodland detail.
Decide what the cap needs to say
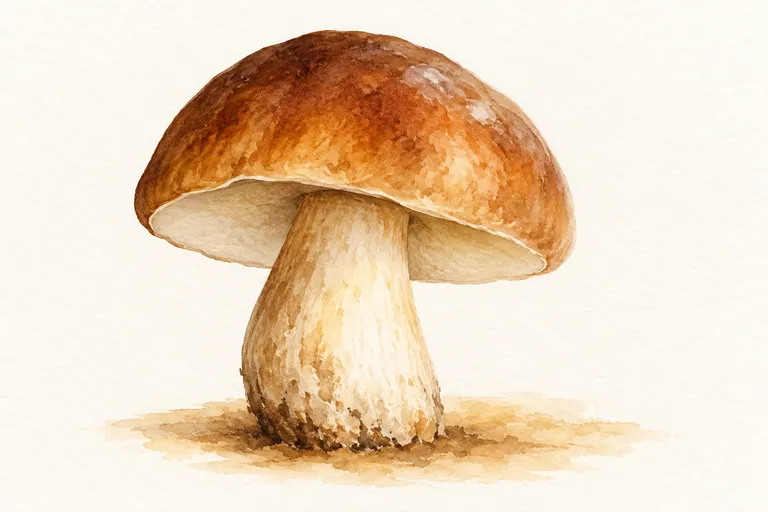
A mushroom can disappear under little dots and gill marks before its main form is readable. Give the cap a clear silhouette first. Choose one side to remain distinct and one short passage that can turn more gently into the surrounding paper. This is an exercise in edge choices, not a rule that every mushroom needs a soft right side.
Use a mushroom you bought for food, your own reference photograph or an image you have permission to study. Do not identify or collect wild fungi from this lesson. The illustration is a proposed painting example, not a specimen guide.
Set up a small test
Use watercolor paper, a round brush, a second clean brush if available, water and two colors that make a warm brown and a cooler shadow. Keep a scrap of the same paper beside the study. There is no exact paint ratio: try a light cap wash and a darker puddle separately, then let both samples dry before choosing.
Canson distinguishes the more contained edges of paint on dry paper from the spreading effects of paint on a wet surface. That is the basic behavior to explore here; the subject-specific exercise below is LUREXEN's practice plan.
Paint the cap in four decisions
- Draw the big shape. Lightly mark the widest part of the cap and its connection to the stem. Compare width with height. Leave out spots and gills.
- Place the pale wash. Paint the cap on dry paper, working around any small light shape you intend to keep. Keep enough mixed paint ready to avoid repeatedly returning to the paint pan.
- Soften one short edge. While that passage is still workable, use a clean, damp—not dripping—brush outside it. Touch the colored boundary lightly and draw the moisture away. Test first; a very wet brush can push water back into the wash.
- Wait before the underside. Let the cap dry. Then add a restrained darker shape beneath it, leaving the stem readable. The underside is not automatically a solid black stripe.
Read it before adding texture
Step back until individual brushmarks stop being interesting. Can you still see the cap's tilt? Does the stem seem to connect beneath it? If the answer is no, adding spots will not repair the structure. On the next attempt, change the contour or underside value before trying more detail.
Add only a few marks in the focal area. A tiny interruption in the wash can suggest surface variation without describing every speck. Keep the quieter side less busy so the edge comparison remains visible.
If something goes wrong
A hard rim everywhere: the wash may have dried before softening. Leave this study intact and try a smaller cap rather than scrubbing dry edges. A pale bloom: compare the moisture in the brush with the paper. A floating stem: look for a small contact shadow and the correct overlap; avoid outlining the whole stem heavily.
Repeat one variable
Paint a second cap with the same silhouette and colors, but keep both sides crisp. Compare the dry studies and write which edge treatment supports the form you wanted. Keep the other decisions stable so the comparison tells you something useful.