Watercolor / Beginner
Paint a Velvet Ribbon Bow: Follow the Loops Before Adding Dark Folds
Give a festive watercolor bow convincing depth with two clear loops, two connected tails and a few soft bands of light.
Choose a bow you can understand
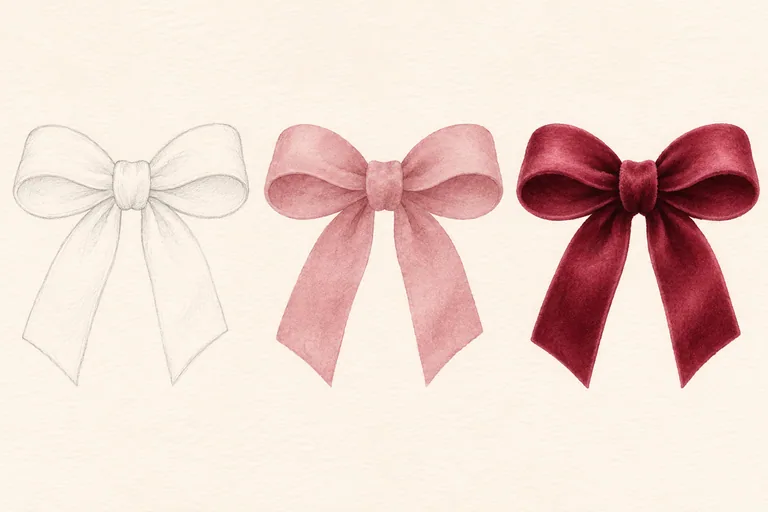
A burgundy ribbon bow makes a useful Christmas-card subject because a small number of shapes can carry the whole design. It also reveals a common painting problem: deep color cannot explain a loop that never connected to the knot. Work from a simple real bow or your own photograph. Choose two loops and two tails rather than a complicated shop display.
Use watercolor paper, a pencil, a medium round brush and a red paint. A little blue or violet can help you test a darker red mixture. Keep a diluted version of the main color ready. The aim is a velvet-like suggestion through broad soft value changes, not a claim to reproduce a particular ribbon fabric exactly.
Follow each piece back to the knot
Lightly mark the knot as a small central shape. Draw one loop emerging from each side and two tails dropping beneath it. Trace the route of every edge with your eyes. Where one piece passes behind another, stop its line at the overlap. Leave space inside each loop so it does not become a solid oval pasted to the knot.
Compare the width of a tail near the knot with its width farther down. A slight turn may narrow the visible ribbon before it widens again. Keep that change modest and connected. Remove an extra edge now rather than trying to explain it later with a dark stripe.
Test a soft light band
On scrap paper, paint a pale red ribbon-width strip. While it is evenly damp, add a stronger red mixture along one side and watch its edge. If it spreads through the whole strip immediately, use a less wet brush on the next test. Let the pale central area remain lighter; it need not be bare white.
Let the swatch dry before judging the contrast. For this exercise, a broad quiet light band is more useful than a narrow brilliant white highlight that makes the ribbon look like polished satin. Your actual reference decides which side of each loop is lightest.
Paint the connected shapes in layers
Lay a pale base over one loop, then move to a nonadjacent tail. Allow neighboring shapes to dry when they need a crisp separation. Deepen the recessed part of a loop and the area just below the knot only after the first wash is dry. Keep those dark accents smaller than the middle-red areas.
Where the ribbon turns gently, soften a selected transition with a clean damp brush. Do not soften every boundary. Some edges need to remain clear so the two tails and the knot stay distinct. Avoid repeatedly brushing a drying wash in pursuit of an even surface.
Stop when the folds read
Look at the bow from a distance. Can you identify two loops and two tails without following a heavy outline? If not, correct the one confusing overlap rather than darkening the whole bow. Leave the surrounding card space open for a greeting after the paint dries.
For a second study, keep the outline and move the light to the other side using a new reference. Compare the pencil fabric-fold lesson to separate construction from color. The image here is an illustrative example, not evidence of a recorded paint test.