Beginner / Technique studio
How to Draw Fabric Folds in Pencil: Light, Shadow and Overlap
Draw a plain folded cloth from observation. Find the broad planes, separate an overlap from a soft turn and shade selectively without outlining every wrinkle.
One focused technique study.
Keep the first attempt small enough to repeat. Your own subject, paper and materials are the reference.
- Level
- Beginner
- Practice time
- 30–40 minutes
- Skill focus
- Large fold directions, value relationships and edge differences
- Success looks like
- Draw three main folds with readable light and shadow, keeping one overlap sharper than a rounded turn.
Materials
- Plain light-colored cloth arranged over a chair or table edge
- Drawing paper, an HB or 2B pencil and an eraser
- A stable viewpoint with consistent side lighting
- A small scrap for pressure tests
Draw three main folds with readable light and shadow, keeping one overlap sharper than a rounded turn.
Set up a small subject you can keep still
Arrange a plain cloth over a table edge or chair back so a few broad folds are visible. Avoid a busy pattern for this first study. Sit where you can see a hanging passage and one overlap, and keep your viewpoint stable. Use consistent light rather than repeatedly moving the setup to hunt for a more dramatic shadow.
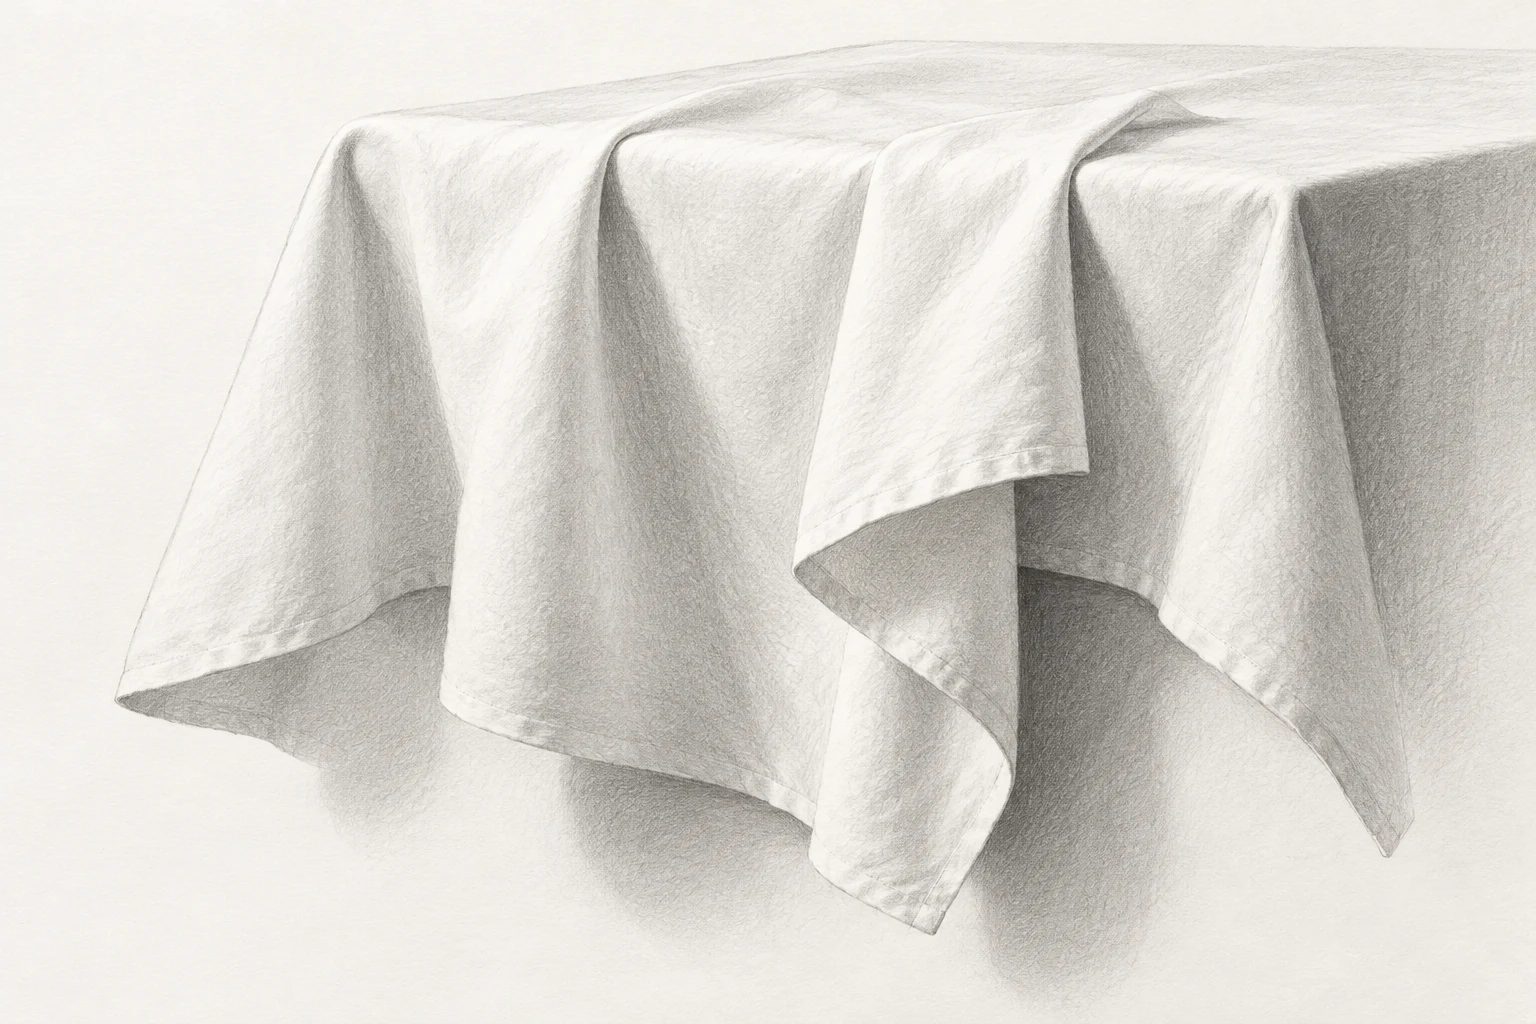
The source below offers general guidance on observing fold directions and building pencil shading. This lesson uses a simpler tabletop study with its own sequence. It does not reproduce the museum reference. Draw your actual cloth; the editorial image is an illustration, not a measured lighting diagram.
Map the outside shape before individual wrinkles
Lightly mark the top, bottom and overall width of the cloth passage you intend to draw. Look for the main tilt of its hanging edge. Compare a few large distances, such as how far the lowest fold reaches below the table, before adding small internal marks.
Select three main fold directions. They need not be evenly spaced or equally long. Connect each to what you observe: where the cloth rests, where it hangs, or where it meets another layer. Do not invent a regular fan of lines merely because that pattern looks like a familiar symbol for fabric.
Separate a rounded turn from an overlap
Follow one fold visually from a light-facing plane into its darker side. A broad rounded turn may show a gradual change, while an overlap can create a more definite boundary. Compare both in your setup rather than making every internal edge equally sharp.
Place a light note for the overlap and keep the rounded passage less definite. A pencil line is a temporary guide, not necessarily an edge that must survive unchanged. If you cannot tell which layer is in front, return to the subject and inspect the junction before adding darkness to explain it.
Lay in broad value groups with light pressure
Reserve the lightest paper and establish a gentle middle value across the main turned planes. Use a small patch of strokes first to check pressure. Keep the strokes consistent enough that they do not compete with the fold direction. Build gradually instead of pressing hard to finish a dark area quickly.
Compare each shadow with its neighbor. Not every crease is the deepest dark, and a dark mark is not automatically a hole in the cloth. Use your observed light arrangement to decide where the strongest dark belongs. Keep the study readable from arm’s length before adding tiny wrinkles.
Refine only the edges that explain the layers
Strengthen a short overlap where one layer clearly crosses another. Let a rounded transition remain softer by spreading the value change over a wider passage. Lift an accidental construction mark gently if needed, but do not erase repeatedly until the paper becomes rough.
Choose a small number of details that clarify the drape. A seam or minor crease may be omitted if it distracts from the main folds. This is selective observation, not a requirement to document every thread. Stop periodically and compare the whole silhouette with the subject, not just the area under the pencil.
Review the structure before calling it finished
Step back and identify the light plane, the turned plane and the overlap without relying on labels. If everything looks striped, soften or reduce one unnecessary line rather than darkening all the others. If the cloth appears flat, check the broad value relationships before adding more texture.
Try a second small study of the same arrangement with fewer marks. Keep one overlap crisp and one turn gradual. Compare whether the simpler version makes the layers clearer. Record the decision you would repeat; the goal is a readable study of this cloth, not a universal formula for every fabric.
Change one decision, not everything.
Common mistakes
Every wrinkle gets a dark outline
Select broad folds and use value changes for softer turns.
All folds become evenly spaced stripes
Check their actual direction and unequal spacing against the subject.
Texture is added before structure
Make the silhouette and large value groups readable first.
Think it through
Try answering these questions in your own words, then open each answer to compare. Use the self-check below to review your actual study.
How can I avoid evenly spaced fold stripes?
Check their actual direction and unequal spacing against the subject.
Practice step: All folds become evenly spaced stripes
How does an overlap differ from a rounded turn?
Follow one fold visually from a light-facing plane into its darker side. A broad rounded turn may show a gradual change, while an overlap can create a more definite boundary. Compare both in your setup rather than making every internal edge equally sharp.
Practice step: Separate a rounded turn from an overlap
Review your own study
Tick what you can observe in your work. If a point is unclear, open its practice reminder. Choose one point to focus on next.
Tick a point only when you can observe it in your study.
Choose one focus for your next attempt using the circle beside a point.
This is your own reflection, not an assessment of your artwork. Choices are not saved or uploaded and reset when this page reloads.
Further learning and source context
Original LUREXEN exercise. Further reading supports the general methods, not a recorded test of the illustration.