Watercolor / Beginner
Paint a Weathered Brick Wall in Watercolor: Group the Color Before the Mortar
Build a small wall study with staggered brick shapes, a few connected color groups and selective weathered texture.
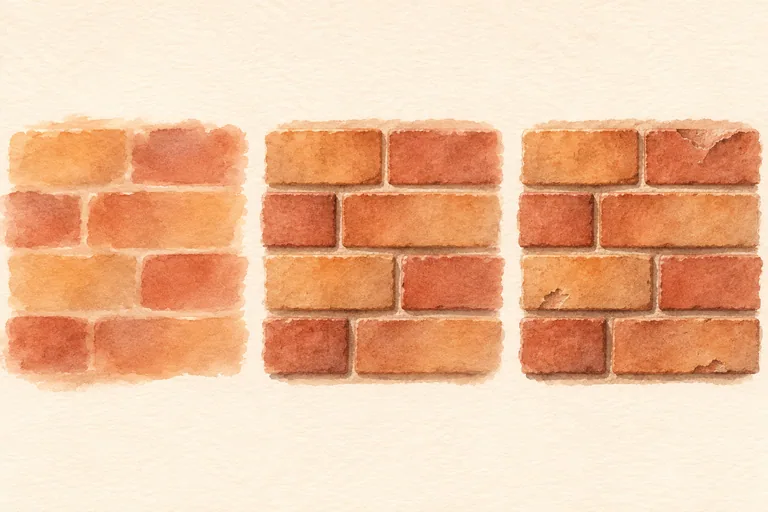
Study a small front-facing section
A brick wall becomes tiring when every brick receives a separate outline, wash and shadow. Start with a small crop from your own photograph or a wall you can observe safely. A nearly front-facing view lets you concentrate on color groups and surface changes before tackling strong perspective.
Use watercolor paper, a pencil, a round brush and two or three earth colors with a blue or another suitable mixing color for neutrals. Your wall might be red, buff or gray; follow its actual appearance. The image above is an AI-generated teaching illustration, not evidence of a physical painting demonstration.
Map the rows and the joint pattern lightly
Indicate a few horizontal courses, allowing for the irregularity you see. In a common running-bond pattern, vertical joints are offset from one row to the next. Other bonds exist, so check your reference before using that arrangement. Limit the study to a manageable group of bricks.
Keep the mortar spaces narrow enough to belong to the wall. Avoid drawing heavy pencil boxes around every unit. Mark only the joints you need to guide the first wash. If you choose a wall turning away from you, the rows and brick widths need coherent perspective, which adds a separate construction problem.
Paint connected warm color groups
Mix a pale base wash and test it on scrap watercolor paper. Think in small neighboring groups: a warm cluster, a slightly cooler cluster and a lighter patch. Keep selected mortar areas as pale paper where that suits your reference. You do not need a different paint mixture for every brick.
Work around the intended light joints with a brush point. Allow modest color variation inside a brick while its wash is wet, but keep separate groups from becoming a continuous puddle. Canson's distinction between wet-on-wet diffusion and wet-on-dry control is useful background for deciding where a softer variation belongs.
Let the wall dry before adding recesses
After the first layer is completely dry, choose a few joints that need a deeper accent. Add short, narrow shadow marks under selected brick edges or at small recesses. Do not turn every mortar line black. Some joints can remain almost lost within a broad light area.
Check the light direction in your reference. A dark line around all four sides of each brick suggests a repeated graphic pattern rather than a weathered surface. Keep your strongest accents concentrated where they explain depth or support the composition.
Use texture in a limited area
Add a few broken marks to suggest chipped faces or rough edges. Leave plenty of the base wash visible. Try these marks on a scrap first so you know how much moisture and pigment your brush is carrying. A loaded wet brush can make a solid blot instead of a broken texture.
Weathering is uneven. Place a quiet cluster of marks near one edge or a slightly darker patch, then let neighboring areas stay simple. Avoid using salt, scraping or heavy scrubbing as a substitute for observing the wall; none of those techniques is required here.
Judge the wall as one surface
From a distance, the wall should read as a coherent plane with a few useful variations. If the mortar dominates, reduce its contrast in the next study and enlarge the connected color groups. If every brick looks identical, vary a few values and edge treatments rather than adding detail everywhere.
For a second attempt, include the edge of a window or a pot so you can compare brick texture with a smoother form. The terracotta pot lesson offers a related earth-color study. Keep this first wall small enough that the exercise stays about observation rather than endurance.