Beginner / Studio practice
How to Draw Cast Shadows: Move One Light, Compare Two Studies
Draw a cup and its cast shadow with one desk light. Keep your viewpoint fixed, move the light, then compare shadow direction and shape in two studies.
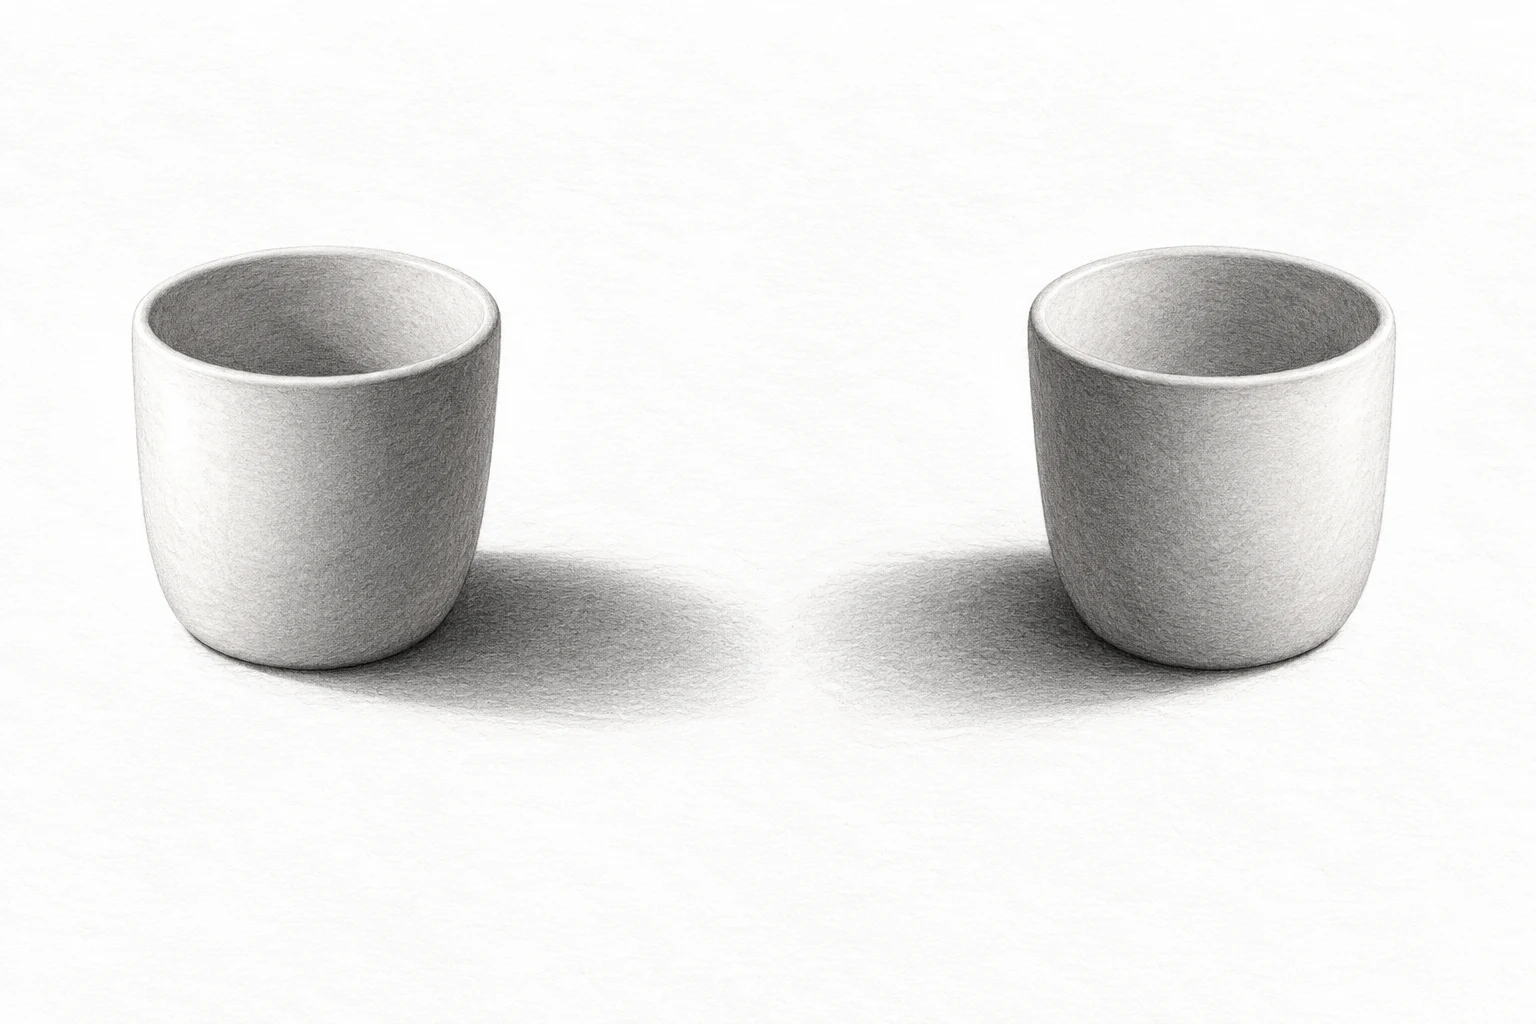
One focused, repeatable study.
Keep the first attempt small enough to repeat. Your own subject, paper and materials are the reference.
- Level
- Beginner
- Practice time
- 25–35 minutes
- Skill focus
- Light direction, cast-shadow shape and grounding contact
- Success looks like
- Complete two small studies in which the shadow changes with the light while the cup and viewpoint stay fixed.
Materials
- A plain matte cup or another simple opaque object
- A stable tabletop, pale paper and one adjustable desk light
- Drawing paper, HB or 2B pencil and eraser
- A small scrap for noting the light positions
Complete two small studies in which the shadow changes with the light while the cup and viewpoint stay fixed.
Separate a cast shadow from shading on the object
A form shadow is the darker region on the object itself; a cast shadow falls on another surface where the object blocks light. Drawing both as one dark symbol can make an object float or flatten. Start by finding the shadow on the tabletop before trying to shade the cup smoothly.
Getty’s model-and-light activity connects source position with shadow direction and length. This lesson uses an original paired pencil exercise, not a copy of the museum activity. The goal is a comparison you can see at your desk, not a physically measured lighting experiment.
Fix the object and your viewpoint
Set a plain cup on a pale sheet and choose one seated viewpoint. Position a desk light to one side so the cast shadow is readable. Reduce competing light only if you can do so safely and still see your materials clearly. Never cover a lamp or touch a hot bulb; follow the light’s instructions.
Lightly draw the cup’s total height, width and opening. Note where it meets the table. Keep the object and your chair in place throughout this first study. If you lean far sideways to inspect a shadow edge, return to your original view before making its shape permanent on the page.
Map the shadow as a flat shape first
Look at the shadow’s furthest extent, its widest part and where it joins the cup. Put small light marks at those limits, then connect them with a simple envelope. Compare that envelope with the object’s visible width. Do not automatically substitute an ellipse that fits a familiar drawing symbol.
Notice which edge segments appear clearer and which are softer. Edge softness depends on the light and setup; this is not a rule that every near edge must be razor-sharp or every far edge invisible. Observe the difference you have, and preserve it instead of smudging the entire boundary equally.
Build contact and broad values without crushing the shape
Apply a light layer of pencil within the mapped shadow. Add a stronger contact accent only where you observe the darkest connection beneath the cup. Keep the drawing light enough that you can still adjust the shadow envelope. A dark tone is not a substitute for checking its direction.
Shade the cup simply, separating its light-facing side from its darker side. The shadow on the cup and the shadow on the table should make sense with the same light source. If the body suggests light from the left but the tabletop shadow points left as well, recheck the setup before deepening anything.
Move only the light and draw a second study
Move the light to a clearly different side, keeping its position stable once chosen. Leave the cup, table and your seated view unchanged. Start a second small drawing beside the first rather than trying to convert the first shadow into the new one. Note where the light moved.
Check the new shadow’s direction, length and outline from observation. It may not become a mirror image, especially if the light’s height or distance changed too. You are comparing real setups, not forcing two neat opposites. Keep any difference in the cup’s outline small enough that the changed light remains the main variable.
Review whether the shadows explain the light
Place the two studies together and point to the likely light direction in each. Can you explain the answer using the cast shadow and the shading on the cup? If those clues conflict, choose one study to repeat with a clearer single-light arrangement.
Record one shape observation and one edge observation. Keep these more specific than “needs more shading.” For the next still life, establish the cast-shadow envelope early; it helps you place the object on a surface before details compete for attention. Continue with value massing to group a more complex arrangement into a few readable tones.
Change one decision, not everything.
Common mistakes
The shadow is a generic oval beside every object
Map its observed limits and contact with the object.
All shadow edges are blended equally
Compare individual edge segments before softening them.
Object shading contradicts shadow direction
Recheck both against the same stable light source.
Think it through
Try answering these questions in your own words, then open each answer to compare. Use the self-check below to review your actual study.
How does a cast shadow differ from shading on the object?
A form shadow is the darker region on the object itself; a cast shadow falls on another surface where the object blocks light. Drawing both as one dark symbol can make an object float or flatten. Start by finding the shadow on the tabletop before trying to shade the cup smoothly.
Practice step: Separate a cast shadow from shading on the object
What should stay fixed when I move the light?
Set a plain cup on a pale sheet and choose one seated viewpoint. Position a desk light to one side so the cast shadow is readable. Reduce competing light only if you can do so safely and still see your materials clearly. Never cover a lamp or touch a hot bulb; follow the light’s instructions.
Practice step: Fix the object and your viewpoint
Review your own study
Tick what you can observe in your work. If a point is unclear, open its practice reminder. Choose one point to focus on next.
Tick a point only when you can observe it in your study.
Choose one focus for your next attempt using the circle beside a point.
This is your own reflection, not an assessment of your artwork. Choices are not saved or uploaded and reset when this page reloads.
Further learning and source context
This is an original LUREXEN exercise. The sources below provide material or concept context; they do not document the exact study pictured above. No publisher artwork was reused.
- Getty Education: Watching Wheatstacks ↗ — Museum activity links model shadows with source position. Our paired cup drawing is an independent exercise; no collection image is reused.