Beginner / Studio practice
Line and Wash for Beginners: Test the Ink, Then Paint
Start line and wash with a pen-and-paper test. Sketch a small houseplant, let the ink dry, then add selective watercolor without filling every outline.
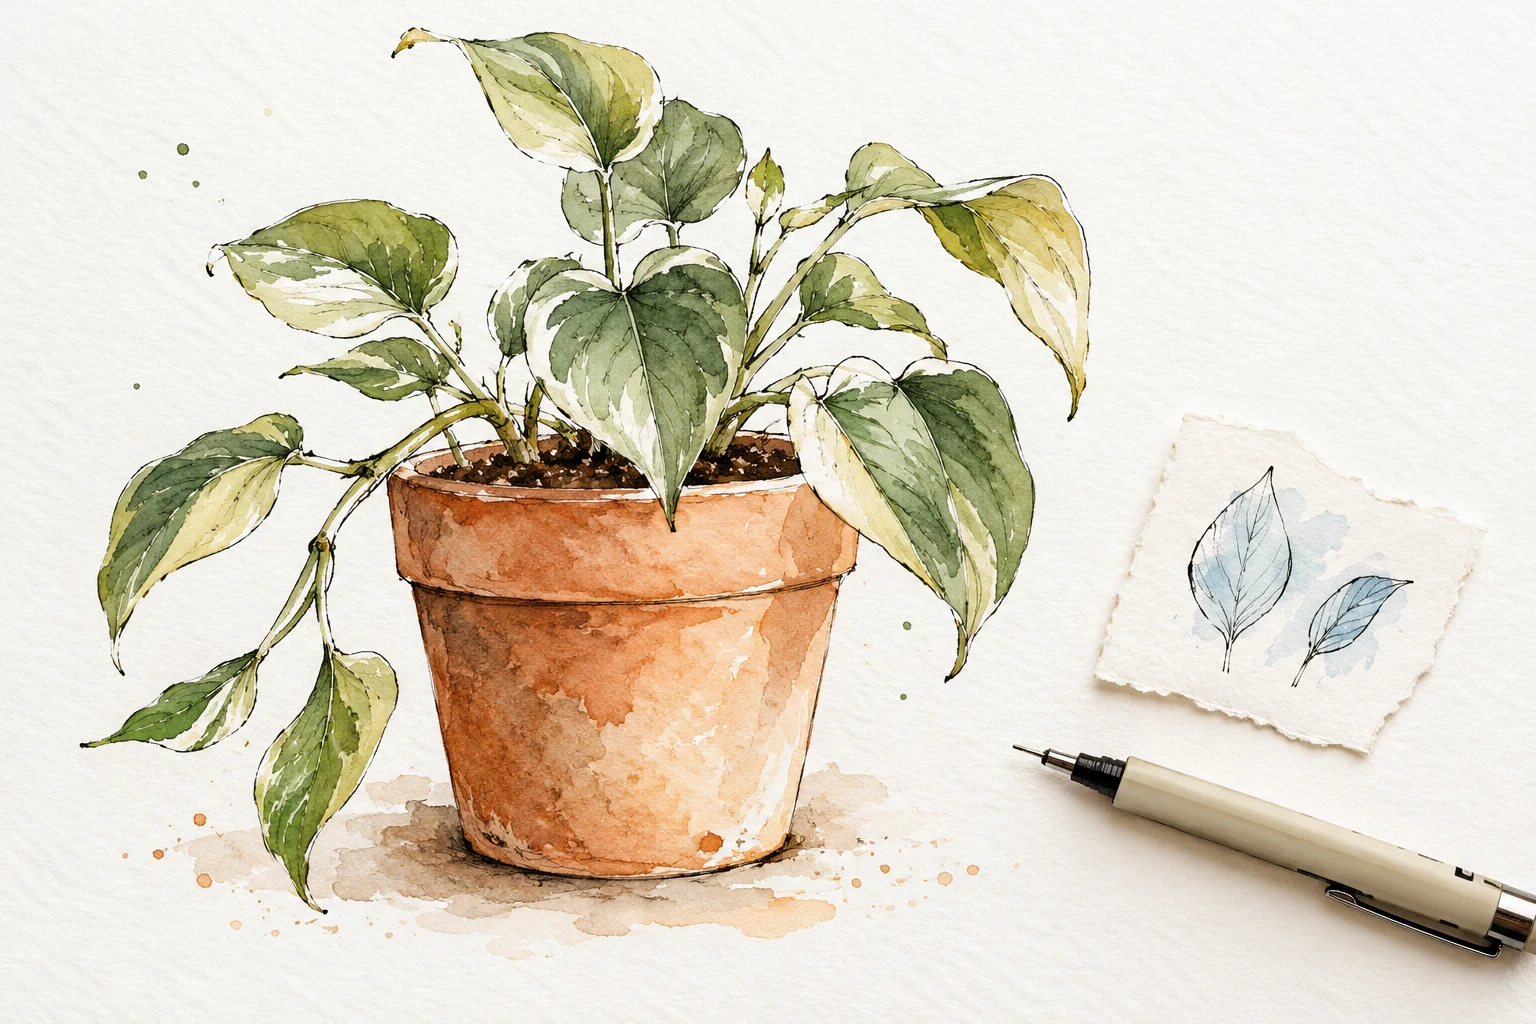
One focused, repeatable study.
Keep the first attempt small enough to repeat. Your own subject, paper and materials are the reference.
- Level
- Beginner
- Practice time
- 30–40 minutes, plus drying
- Skill focus
- Ink compatibility, selective contours and transparent washes
- Success looks like
- Complete one small houseplant sketch with stable ink lines, a few open contours and a wash that leaves deliberate white space.
Materials
- Watercolor paper plus an offcut from the same sheet
- A drawing pen whose manufacturer describes its dry ink as waterproof
- A round brush, two watercolors, water and a palette
- A small houseplant or your own clear photograph
Complete one small houseplant sketch with stable ink lines, a few open contours and a wash that leaves deliberate white space.
Check the pen before drawing the whole subject
Line and wash combines a drawn structure with painted passages. If you want the ink to remain sharp beneath watercolor, check the exact pen guidance first. Waterproof after drying is different from water-soluble ink that intentionally spreads. A black line alone does not tell you which one you have.
Make several lines on an offcut of the paper you plan to use. Let them dry according to the product guidance, then carry a clean-water stroke across one and a pale wash across another. Sakura describes its Pigma ink as water-resistant after drying; that statement is product-specific, not a promise about every drawing pen.
Choose a houseplant with a clear silhouette
Place a small plant where you can see the pot, the direction of the main stems and several distinct leaves. Do not choose it for the number of details. A simple shape with some gaps is easier to organize than a mass of overlapping foliage. Keep the viewpoint still for the first sketch.
Make a light pencil envelope for the total height and width. Check the pot opening and the lean of the main stem before drawing veins or leaf tips. If the plant is complex, choose one small section rather than squeezing every branch into the study. The exercise is about coordinating two media, not cataloging the plant.
Use the ink to select, not to fence in every wash
Draw the pot rim, a few structural edges and the most useful leaf contours with light, unhurried marks. Leave several edges open where the watercolor or untouched paper can explain the shape. Keep interior details sparse so the pen does not do all the work before painting begins.
A rough surface can catch a fine nib. Test the pressure and stroke length on your offcut instead of forcing a long line through the grain. Let the pencil remain faint if erasing would disturb fresh ink. Avoid retracing every uncertain contour into a thick outline; compare the shape, then make a separate correction when needed.
Wait for dry ink, then place two simple washes
Use the offcut to confirm that the drawn lines are ready before wetting the sketch. Paint a pale green passage across the main foliage shapes and a warm earth-color wash on the pot, leaving some paper visible. The wash can move slightly beyond a line if that serves the loose study. It need not fit every enclosure like a coloring exercise.
If the ink begins to bleed unexpectedly, stop that passage and let it dry. Do not scrub to chase the spreading color. The useful response is to return to the material test, not assume the whole drawing needs another coat. No fixed waiting time replaces checking your own pen, paper and conditions.
Add darks only where they explain an overlap
When the first washes have dried, compare the plant again. Add a little darker color beneath one leaf or inside the pot opening if the observed overlap needs it. Keep other passages lighter. Repeating the same strong edge around every leaf can make the foliage look cut from a uniform sheet.
You can also choose paint first and ink second in another study. In that order, let the watercolor dry fully before drawing over it and test the nib on a painted scrap. A wet or roughened surface may interfere with the line. Neither order is automatically superior; they assign different jobs to the two materials.
Compare the roles of line and color
Look at the sketch at arm’s length. Identify one area where ink carries the structure, one where the wash describes a plane and one where white paper provides rest. If all three areas look equally outlined and filled, repeat a smaller version with fewer pen marks.
Keep the compatibility strip with the finished sketch and note the pen and paper used. Next time you can change the order or reduce the amount of line while keeping the subject simple. Continue with the window-view lesson when you are ready to apply selective structure to a wider scene.
Change one decision, not everything.
Common mistakes
The ink spreads as soon as the wash arrives
Check the exact ink type and test dried lines on the same paper.
Every shape is enclosed and filled uniformly
Leave a few contours open and let paint and paper share the description.
A nib is pushed over a damp painted surface
Wait for the wash to dry and test the pen on a painted scrap.
Think it through
Try answering these questions in your own words, then open each answer to compare. Use the self-check below to review your actual study.
What can I try if the ink spreads under the wash?
Check the exact ink type and test dried lines on the same paper.
Practice step: The ink spreads as soon as the wash arrives
Must every shape be fully enclosed?
Leave a few contours open and let paint and paper share the description.
Practice step: Every shape is enclosed and filled uniformly
Review your own study
Tick what you can observe in your work. If a point is unclear, open its practice reminder. Choose one point to focus on next.
Tick a point only when you can observe it in your study.
Choose one focus for your next attempt using the circle beside a point.
This is your own reflection, not an assessment of your artwork. Choices are not saved or uploaded and reset when this page reloads.
Further learning and source context
This is an original LUREXEN exercise. The sources below provide material or concept context; they do not document the exact study pictured above. No publisher artwork was reused.
- Sakura of America: Pigma Micron product guidance ↗ — Manufacturer guidance for dry ink behavior and watercolor use; no brand is required and the plant exercise is original.