Beginner / Technique studio
Watercolor Pencils for Beginners: Dry Marks, Soft Washes
Learn how to activate watercolor pencil with a damp brush, keep selected dry marks and build a small leaf study without flooding or scoring the paper.
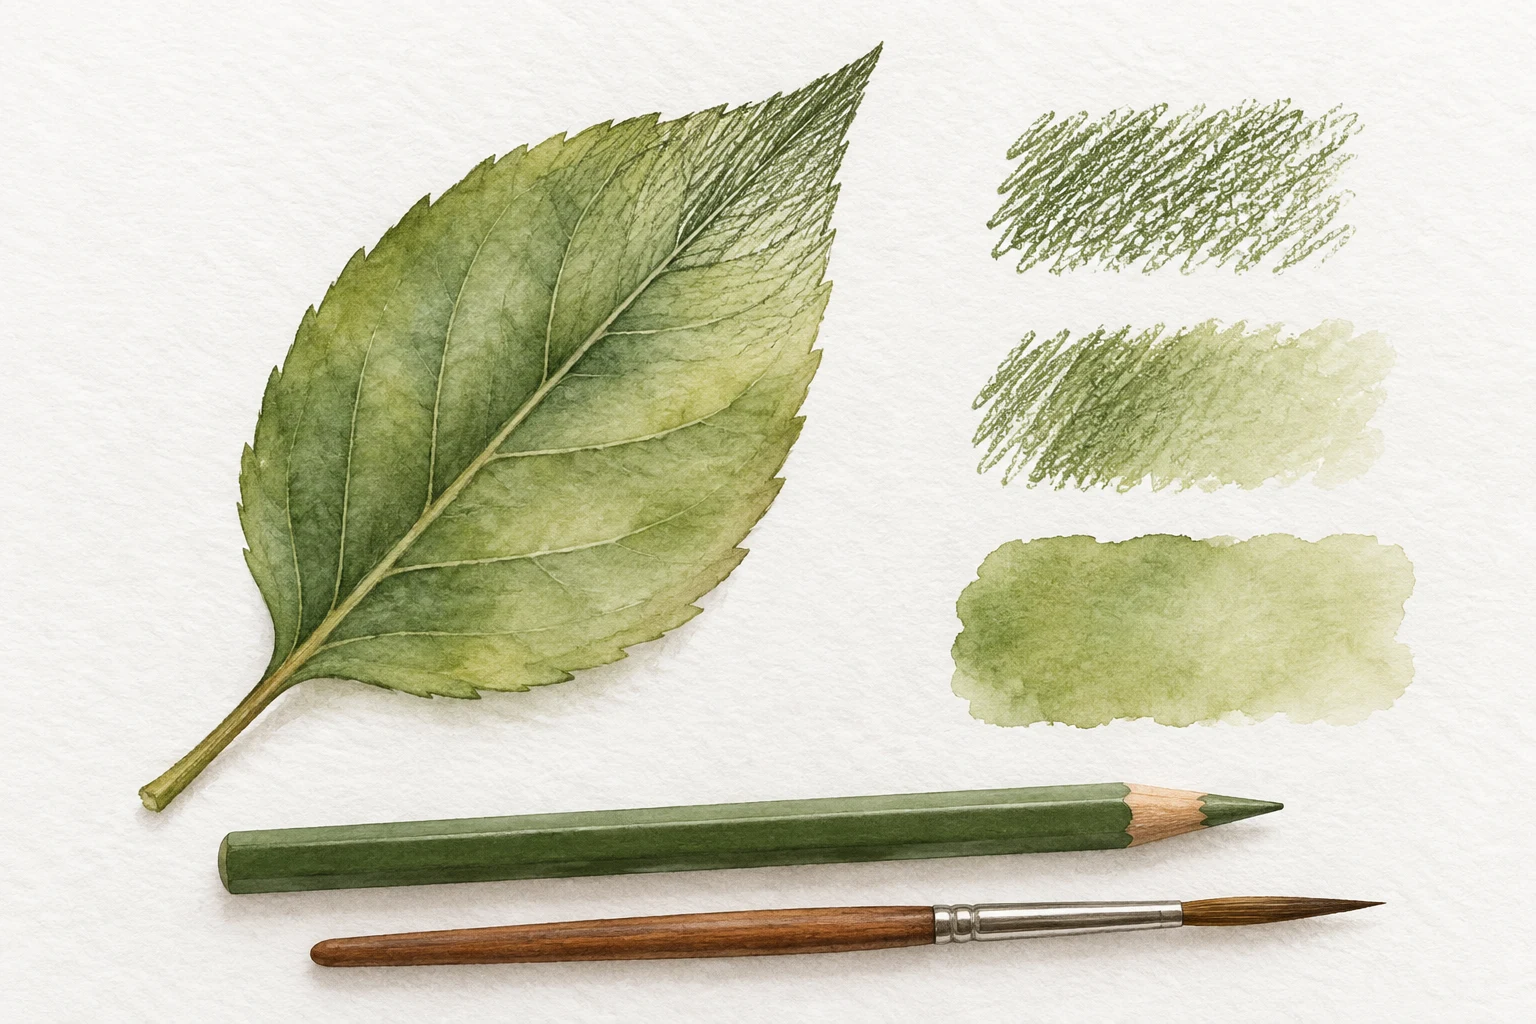
One focused technique study.
Keep the first attempt small enough to repeat. Your own subject, paper and materials are the reference.
- Level
- Beginner
- Practice time
- 25–35 minutes, plus drying
- Skill focus
- Selective activation, gentle pressure and deliberate texture
- Success looks like
- Make a leaf study that combines a soft wash with a clearly chosen area of dry pencil texture.
Materials
- Water-soluble colored pencils, checked against their packaging
- Watercolor paper and a matching scrap for tests
- A small soft brush, clean water and a cloth
- A real leaf or your own simple leaf sketch
Make a leaf study that combines a soft wash with a clearly chosen area of dry pencil texture.
Check that the pencil is water-soluble
Ordinary colored pencils and watercolor pencils are not interchangeable. Check the label before adding water. On a scrap, make a light patch, pass a damp brush through one end and see how the mark responds. This small test belongs beside your study rather than on its most important edge.
Water-soluble pencil can be used dry or softened with water; some marks may remain visible after activation. The manufacturer source below describes these general options. The leaf exercise here is an original LUREXEN study, not a reproduction of that demonstration or a promise that every pencil behaves alike.
Build a useful test strip before the leaf
Divide a scrap into three loose areas with space between them. In each, place a similar amount of green pencil using light pressure. Leave the first dry, brush through only half of the second, and soften the third more evenly. Compare them once dry before choosing which character suits the leaf.
Keep the brush damp rather than dripping. Touch it to a cloth if a bead of water gathers at the tip. Record which marks remained visible and whether the paper surface changed. If the pencil cut grooves into the sheet, make another lighter strip rather than trying to dissolve the dents away.
Choose where line should remain visible
Observe a simple leaf and lightly establish its overall length, widest point and main direction. Keep the drawing modest in size so a single brushload can be controlled. Choose a small area, perhaps the tip or one side of the central vein, where dry texture will remain part of the finished study.
Put a little more pencil in the area intended to read darker, but avoid pressing a heavy outline around every edge. Leave the lightest area with little or no color. This is a plan for your own leaf, not a rule that every leaf needs the same highlight, vein pattern or symmetrical shape.
Activate one passage and then stop
Rinse the brush, reduce excess water and touch a small section of the colored area. Draw the released color into the neighboring paper with a few gentle movements. Keep the reserved dry passage outside that wet area. Work from the lighter passage toward the stronger color if carrying pigment into the light would defeat the plan.
Do not keep brushing simply because some grain remains. A visible pencil mark can be intentional. If the whole surface becomes shiny with pooled water, pause and let it settle rather than dragging that puddle into another area. Observe the dry result before deciding whether more color is needed.
Add a second decision only after drying
Once the sheet is fully dry, compare its soft and grainy passages. Add a few light pencil marks where they explain the leaf direction or strengthen a selected edge. Leave other areas quiet. Test any planned second activation on scrap first, because rewetting may move earlier color.
A second layer is optional. If the form already reads clearly, more veins can make it busier without making it more convincing. Avoid treating every visible pencil stroke as a flaw. The useful question is whether that mark contributes to the texture you chose at the start.
Compare texture choices, not brand promises
Place the finished study beside the test strip. Identify one intentional dry passage, one softened passage and one place where pressure or water was less controlled. Make a second small leaf with only one change, such as less pressure before activation or a smaller wet area.
Keep the tests with the pencils you used. They are more useful than assuming all sets dissolve completely or behave like tube paint. If the paper looks abraded, begin a fresh test rather than scrubbing. A small, readable study is the goal; a perfectly smooth surface is not required.
Change one decision, not everything.
Common mistakes
An ordinary colored pencil is expected to dissolve
Check the product label and test a small patch first.
Heavy pressure leaves grooves
Use lighter layers; water cannot remove an indentation.
Every mark is washed away
Reserve a specific dry area so the texture choice stays deliberate.
Think it through
Try answering these questions in your own words, then open each answer to compare. Use the self-check below to review your actual study.
How can I check that the pencil is water-soluble?
Ordinary colored pencils and watercolor pencils are not interchangeable. Check the label before adding water. On a scrap, make a light patch, pass a damp brush through one end and see how the mark responds. This small test belongs beside your study rather than on its most important edge.
Practice step: Check that the pencil is water-soluble
When should I add a second layer?
Once the sheet is fully dry, compare its soft and grainy passages. Add a few light pencil marks where they explain the leaf direction or strengthen a selected edge. Leave other areas quiet. Test any planned second activation on scrap first, because rewetting may move earlier color.
Practice step: Add a second decision only after drying
Review your own study
Tick what you can observe in your work. If a point is unclear, open its practice reminder. Choose one point to focus on next.
Tick a point only when you can observe it in your study.
Choose one focus for your next attempt using the circle beside a point.
This is your own reflection, not an assessment of your artwork. Choices are not saved or uploaded and reset when this page reloads.
Further learning and source context
Original LUREXEN exercise. Further reading supports the general methods, not a recorded test of the illustration.