Watercolor / Beginner
Paint a Red Amaryllis: Petal Overlaps Before Fine Veins
Build a festive flower from six broad shapes, pale channels and selective dark overlaps, with a one-petal test before the full bloom.
Choose a view with readable overlaps
An amaryllis makes a striking winter flower study, but the fine stripes are easier to manage after its large shapes work. Use a real flower or your own photograph, or a reference you have permission to study. Start with one bloom facing mostly toward you. A heavily tilted flower adds perspective problems before you have practiced the petals.
Set out watercolor paper, a medium round brush, a red paint and a little blue or violet for a darker test mixture. Keep a pale area on your palette for diluted red. A second brush is helpful for softening selected edges, but not essential.
Map the six broad shapes
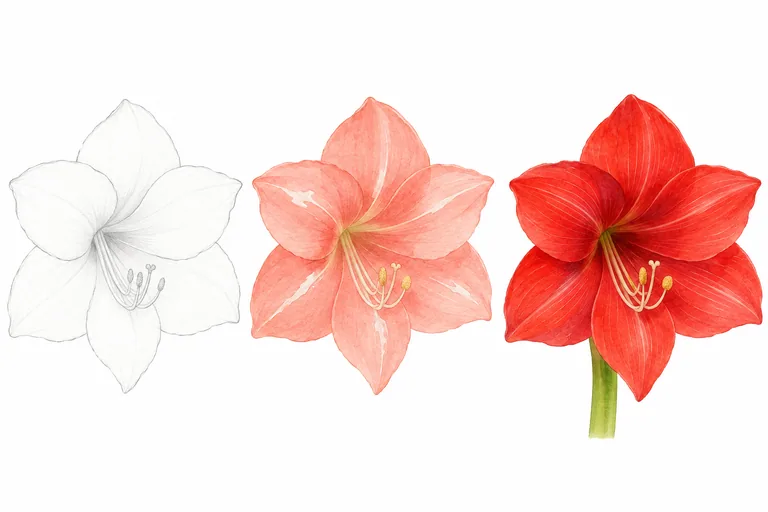
Lightly mark the center of the throat and the outer reach of the flower. Arrange six broad petal-like shapes around it; botanically these are tepals. Watch which ones sit in front. Do not make six identical spokes. Your reference may show one partly hidden or shortened by the viewing angle.
Mark just a few pale veins or channels that you want to reserve. Keep the pencil light enough to sit quietly beneath transparent paint. Place the central stamens after the large shapes are settled, so they do not become a substitute for the flower’s structure.
Test one petal before the bloom
On a scrap of the same paper, paint a broad diluted red petal, leaving a narrow pale channel. While the wash is evenly damp, touch a little stronger red near its base. Let the pigment move without repeatedly brushing it. If it rushes to the outer edge, use less water on the next test.
Allow the swatch to dry. Compare the pale channel, the middle wash and the darker base. You need a readable difference between them; the exact red will vary with your pigment and paper.
Separate the overlapping petals
Paint a light base on one petal, then work on a nonadjacent shape while it dries. When two neighboring areas must stay separate, let the first dry before bringing another wash against its edge. Add darker accents at selected overlaps and near the throat after the base layer is dry.
Keep the outer tips quieter and lighter where that agrees with your reference. Avoid outlining the entire flower in dark red. A few clear boundaries can describe the overlaps while the softer passages keep the petals from looking cut out.
Add veins only where they help
Use a pointed brush and a slightly stronger mixture for a few tapered marks traveling from the base toward the tip. Leave other veins as pale gaps. Add the stamens with a light touch and stop before every petal carries the same amount of detail.
At arm’s length, check whether you can still identify the front petals, the deeper throat and a few open highlights. If the flower reads only when you add many veins, return to the large value shapes in your next study. For a different red subject, try the pomegranate-half lesson. The image is an illustrative arrangement, not a botanical specimen record or a physical painting demonstration.