Beginner / Studio practice
Watercolor Splatter: Control Droplets Without Losing the Painting
Test watercolor splatter on dry and damp paper, protect a quiet area with a loose shield, and add texture without covering your focal point.
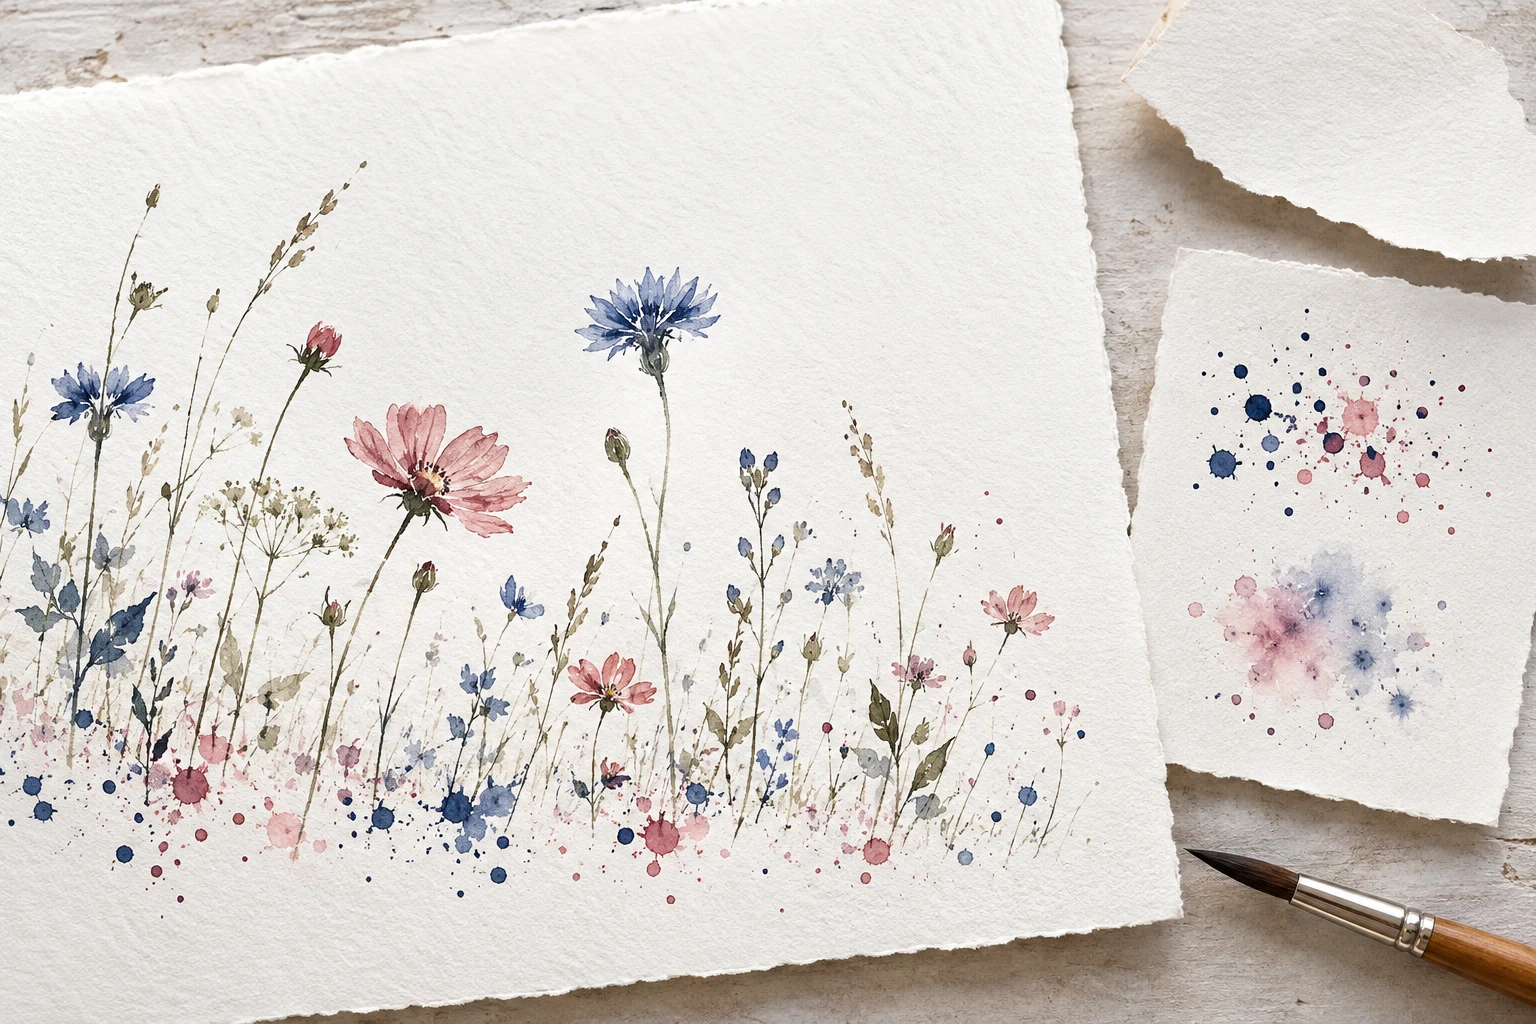
One focused, repeatable study.
Keep the first attempt small enough to repeat. Your own subject, paper and materials are the reference.
- Level
- Beginner
- Practice time
- 20–30 minutes, plus drying
- Skill focus
- Brush load, paper moisture and selective texture
- Success looks like
- Make two comparison swatches, then place a small cluster of droplets while leaving a planned quiet area untouched.
Materials
- Watercolor paper and a spare test strip
- One modest round brush and one watercolor
- Water, palette, cloth and a loose paper offcut
- A washable protective covering for the work area
Make two comparison swatches, then place a small cluster of droplets while leaving a planned quiet area untouched.
Start with a protected test area
Watercolor splatter is a way to deposit separate droplets rather than a continuous brushstroke. It can suggest loose texture, but each tap is less precise than placing a mark with the brush tip. Start on scrap, away from a painting you want to keep. Cover the table and move phones, drinks and other work out of reach.
This exercise uses a small brush and gentle tapping over the paper, not a toothbrush spray or paint blown through a straw. Keep paint away from your face and follow its handling instructions. The physical study linked below discusses brush-driven droplet release; it does not provide a universal recipe for your watercolor mixture.
Find a load that releases separate droplets
Mix a small puddle of color. Load the brush, let the largest excess drop fall back into the palette, and hold it above the test strip. Tap the handle gently with a finger while keeping the brush aimed down at the covered area. Start with one tap and look before repeating.
If a large blob lands, reduce the load for the next test rather than trying to solve it with a more forceful tap. If nothing releases, reload modestly and test again. Keep brush, distance and motion reasonably similar while changing the load. Record what worked in your own words; a specific number of taps will not reproduce every brush.
Compare a dry patch with a damp patch
Keep half a fresh strip dry. Wet the other half evenly, then let any puddles settle before applying a few droplets of the same mixture to each side. Leave a gap so the patches cannot run together. Watch how the marks change, then allow both areas to dry.
Droplets on dry paper tend to retain clearer boundaries, while a damp surface can let them spread. Judge the actual result rather than expecting every dot to stay round or every damp mark to dissolve equally. A test with one pigment and sheet does not predict every other paint-paper combination.
Protect a quiet area with a loose shield
On another scrap, lightly plan a small meadow shape and a blank area above it. Hold a clean paper offcut over the area that should stay quiet, without dragging it across wet paint. Apply a restrained cluster of droplets near the lower part. Remove the shield carefully so wet color cannot drip onto the protected space.
The offcut is a temporary barrier, not adhesive masking and not a guarantee against stray marks. Test its placement before bringing in the loaded brush. A sharply shielded edge can look artificial; if that happens, move the shield farther from the intended texture and use fewer droplets rather than covering the transition with more paint.
Add a few connecting marks, not an explanation for every dot
Once the droplets have dried, place a few fine stems or grass strokes where they genuinely help the small study. Leave some droplets unexplained. They can read as varied foreground texture without each becoming a flower, seed or blade. Keep the quiet region larger than the busiest cluster.
Stand back before adding another layer. If the texture draws attention away from your intended subject, stop. Covering every blank patch will not make the first cluster more deliberate. Keep this first application on a practice sheet until you can judge its scale comfortably.
Review placement before adding complexity
Compare your dry-paper and damp-paper swatches with the small study. Which result gives the edge quality you actually wanted? Note one useful load, one unsuccessful load and where the shield helped. Repeat with only one changed variable, such as a slightly different load or a different patch of moisture.
Use splatter where irregularity serves the subject, not as an automatic finish for every watercolor. A successful test leaves a readable contrast between active texture and rest. For a different kind of broken mark, continue with the dry-brush lesson; it provides more direct contact between tool and surface.
Change one decision, not everything.
Common mistakes
One large blob replaces the intended texture
Reduce brush load and test one gentle tap on scrap.
The entire sheet becomes equally busy
Plan a protected quiet area and stop after one small cluster.
Wet paint transfers from the shield
Keep the offcut clean, lift it away carefully and avoid dragging.
Think it through
Try answering these questions in your own words, then open each answer to compare. Use the self-check below to review your actual study.
How should I protect the work area?
Watercolor splatter is a way to deposit separate droplets rather than a continuous brushstroke. It can suggest loose texture, but each tap is less precise than placing a mark with the brush tip. Start on scrap, away from a painting you want to keep. Cover the table and move phones, drinks and other work out of reach.
Practice step: Start with a protected test area
How can I keep a quiet area free of droplets?
On another scrap, lightly plan a small meadow shape and a blank area above it. Hold a clean paper offcut over the area that should stay quiet, without dragging it across wet paint. Apply a restrained cluster of droplets near the lower part. Remove the shield carefully so wet color cannot drip onto the protected space.
Practice step: Protect a quiet area with a loose shield
Review your own study
Tick what you can observe in your work. If a point is unclear, open its practice reminder. Choose one point to focus on next.
Tick a point only when you can observe it in your study.
Choose one focus for your next attempt using the circle beside a point.
This is your own reflection, not an assessment of your artwork. Choices are not saved or uploaded and reset when this page reloads.
Further learning and source context
This is an original LUREXEN exercise. The sources below provide material or concept context; they do not document the exact study pictured above. No publisher artwork was reused.
- The Fluid Mechanics of Splatter Painting — primary research abstract ↗ — Supports the general role of brush motion and fluid conditions. This home exercise is original and makes no measured droplet-size claims.