Beginner / Technique studio
Mini Watercolor Paintings for Beginners: 5 Small Projects
Try five mini watercolor paintings: a sunset, pear, mountain, cottage and cup. Learn how to simplify shapes and choose one useful skill for each tiny study.
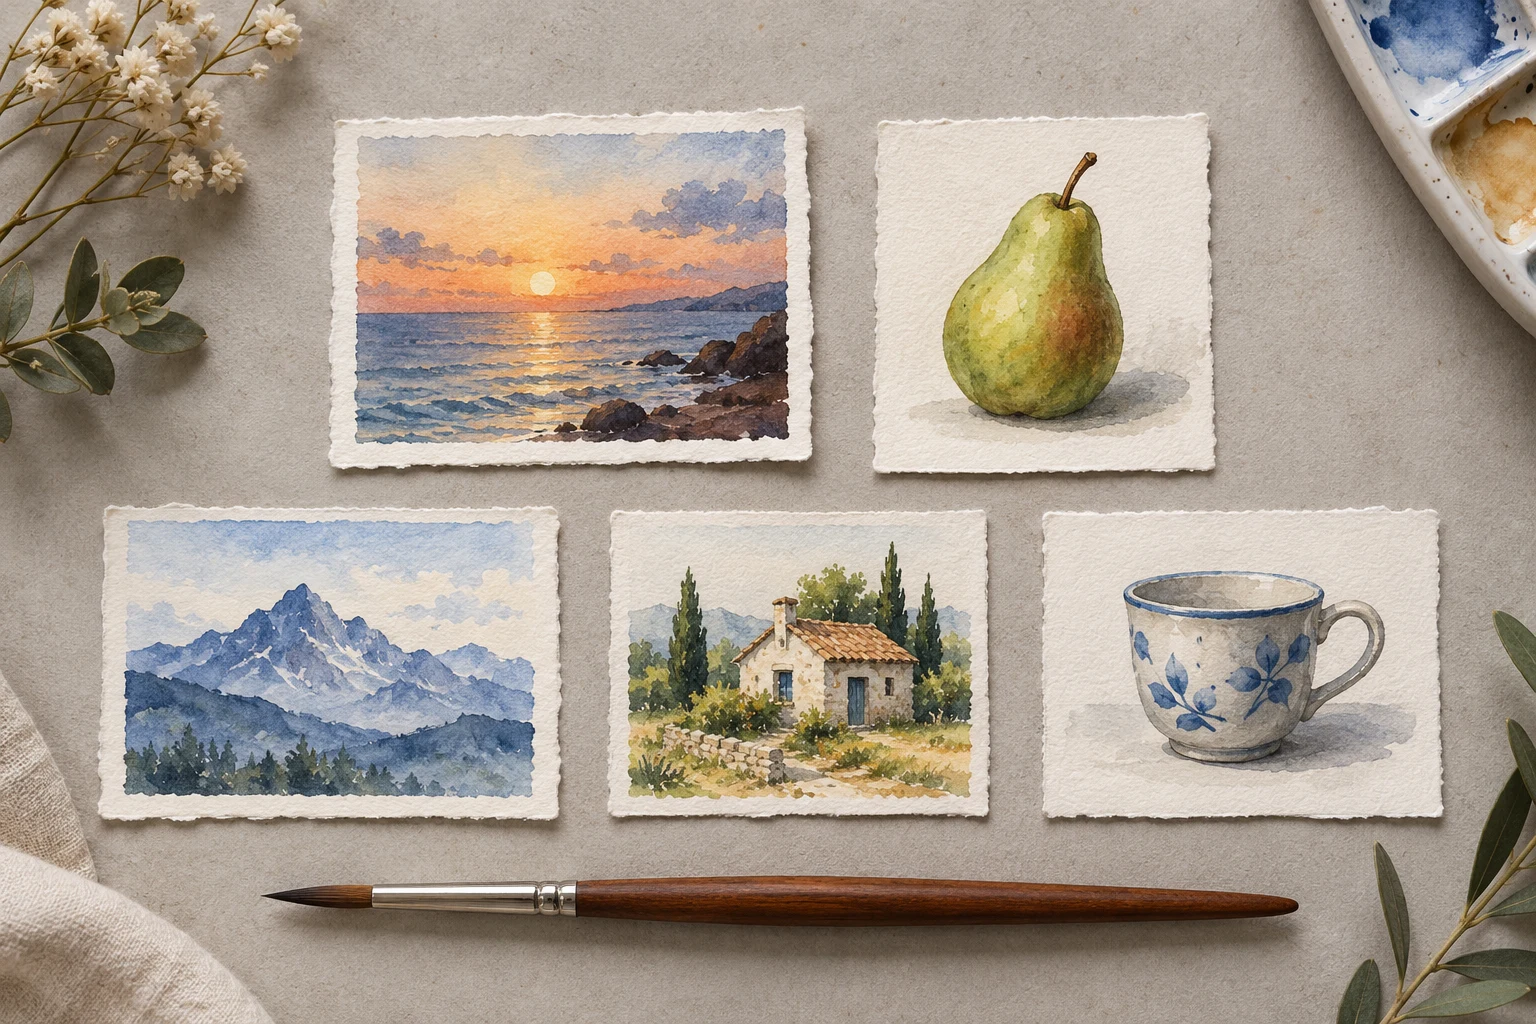
One focused technique study.
Keep the first attempt small enough to repeat. Your own subject, paper and materials are the reference.
- Level
- Beginner
- Practice time
- 25–40 minutes, plus drying
- Skill focus
- Small-format composition, simplification and selective detail
- Success looks like
- Finish one small study that reads clearly at arm’s length, then repeat it with one deliberate change.
Materials
- Five small pieces of watercolor paper, roughly 5–8 cm across
- A pointed round brush, clean water and a mixing palette
- A small selection of familiar paints
- Pencil, scrap paper and an optional cardboard viewing window
Finish one small study that reads clearly at arm’s length, then repeat it with one deliberate change.
Choose one study, not five simultaneous paintings
Mini painting works best when the subject has a clear silhouette or a few broad value groups. Choose one of the five ideas below for a first session. The suggested sizes are practice choices, not compulsory dimensions; use a piece large enough for your brush to move without squeezing every mark.
Use watercolor paper rather than assuming any small card can handle wet paint. Make a three-value thumbnail first: light, middle and dark. If the subject is unreadable at thumbnail size, remove a shape before adding detail. A miniature is a simplified painting, not a full landscape compressed into a tiny rectangle.
Paint a sunset with one horizon decision
Mark a level horizon above or below the middle. Reserve the lightest glow, then place a restrained warm sky wash. Let the sky dry before adding a darker sea so the horizon can stay distinct. Keep the palette small and test neighboring colors on scrap if you are unsure how they mix.
Add only a few broken horizontal marks to suggest water. Do not outline every ripple or paint a heavy ring around the sun. Judge success by a readable light area and a calm horizon. For a second attempt, change the horizon height while keeping the colors similar.
Use a pear or a mountain to practice value
For the pear, draw one uneven rounded silhouette and reserve a light patch. Place a pale local color, allow it to dry, then add a darker passage on one side. Keep the stem small. The exercise is the difference between a light-facing region and a turned region, not a perfect fruit illustration.
For the mountain, use two or three unequal overlapping silhouettes. Make a pale distant shape and let it dry before a darker near shape. Keep their peaks different. A clear overlap teaches more than scattered rock marks that destroy the large silhouette.
Reduce a cottage to wall, roof and ground
Start with a simple front or three-quarter view. Check the roof width and wall height in a light pencil sketch. Paint the wall and roof as separate broad shapes, allowing drying time when you want a crisp boundary. Leave a small light window or add a darker one later, but do not try both approaches in the same tiny space.
Connect the cottage to the ground with one quiet shadow or grass mass. Stop before fence posts, individual bricks and roof tiles take over. Compare a version with one window against one with several: choose the version that remains readable when viewed from farther away.
Make a cup with an opening that stays believable
Sketch a small cup whose top opening has a rounded elliptical shape. Keep the handle secondary and check where it attaches before painting. Use a pale body wash and one darker side passage after drying. Let the interior be darker than the light-facing rim if that matches your reference.
Do not use the outline as the only explanation of the form. A quiet value shift and a small contact shadow can do more. If the cup shape is difficult, draw it larger on scrap first, then select only its most useful features for the miniature.
Review the group before making more
Place your studies together with enough space between them. Ask which one is recognizable before its tiny details become visible. Repeat that subject and change only one choice: a lighter first wash, fewer accents or a different crop. Keep the less successful version beside it.
Pinterest’s August 2026 hobbies report identified growing interest in mini watercolor painting. That explains why this topic is timely, not why a particular painting must look a certain way. Use the small format as a repeatable learning tool rather than a demand to produce five polished results in one sitting.
Change one decision, not everything.
Common mistakes
The miniature is crowded
Remove secondary objects and keep one clear subject.
Everything is outlined
Let broad shapes and values explain some boundaries.
Tiny marks disturb a drying wash
Pause, allow drying and reduce repeated brushing.
Think it through
Try answering these questions in your own words, then open each answer to compare. Use the self-check below to review your actual study.
How can I check a small painting at arm’s length?
Hold the small study at arm’s length. If its subject is unclear, repeat the same project with fewer internal marks and a clearer outer shape.
Practice step: Read the large shape first
How can I protect a deliberate light area?
Name the part you want to stay light before the first wash. Preserve that area in a fresh small attempt instead of trying to recover it with repeated brushing.
Practice step: Keep a deliberate light area
Review your own study
Tick what you can observe in your work. If a point is unclear, open its practice reminder. Choose one point to focus on next.
Tick a point only when you can observe it in your study.
Choose one focus for your next attempt using the circle beside a point.
This is your own reflection, not an assessment of your artwork. Choices are not saved or uploaded and reset when this page reloads.
Further learning and source context
This is an original LUREXEN exercise. These sources support general material and technique decisions or explain topic selection; they do not document the exact study pictured above. No publisher artwork was reused.